
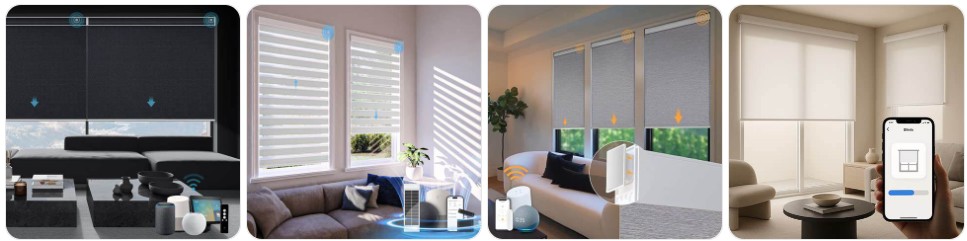
Removing smart blinds is usually straightforward if you disconnect the power source first, support the headrail while releasing the brackets, and take extra care around the motor, battery pack, charging cable, or smart hub components. Unlike standard blinds, smart blinds often include motor housings, hidden clips, charging ports, and app-connected control parts that can be damaged if the blind is pulled down too quickly. This guide explains how to safely remove and take down smart blinds without damaging the brackets, fabric, motor, or window trim, and it also points you to Smart blind parts if you need replacement hardware before reinstalling or repairing the blind.
What You Need Before Removing Smart Blind
- A step stool or stable ladder: Smart blinds usually have a slightly heavier headrail because of the built-in motor, battery tube, or rechargeable drive unit, so safe access matters more than it does with a simple manual blind.
- A small screwdriver or bit set: Some smart blind brackets are spring-loaded, while others use locking tabs or retaining screws. It helps to keep a precision screwdriver set for blind hardware nearby in case the clips are tight.
- Plastic pry tools: These are useful if your smart blinds have snap-on valances, end caps, or a tight bracket cover that you want to remove without scratching the finish. A set of plastic pry tools for window blind removal can help.
- A container for screws, charger clips, and bracket covers: Smart blind hardware can include small charging accessories, cable guides, and mounting clips that are easy to lose during removal.
- Your remote, app access, or original instructions: Some smart blinds need to be moved into a raised position before removal. If the motor still works, raise the blind fully so the fabric or slats are protected and the headrail is easier to handle.
- A second person for larger blinds: This is especially helpful for wide smart roller blinds, motorized zebra blinds, large solar blinds, and dual-motor systems. Do not let the motor side drop suddenly when the first bracket releases.
- Replacement mounting items if the brackets are worn: If you already know a clip, charger mount, or bracket is cracked, it can save time to compare smart blind parts and mounting hardware before taking everything down.
Smart Blind Removal Guide
Smart blind removal is mostly about protecting the motorized headrail and avoiding stress on the powered side of the blind. Before you begin, raise the blind fully if possible, disconnect any charger or exposed power lead, and identify whether the blind is held by spring clips, twist-lock brackets, or retaining screws. Never yank the headrail downward, because many smart blinds release from one side first and can twist if the motor end is not supported properly.
- Raise the smart blind fully: If the blind still has power, use the remote, wall switch, or app to move it into the fully open position. This protects the fabric, slats, ladder tapes, or vanes and makes the headrail easier to handle.
- Disconnect power or charging accessories: Unplug any visible charging cable, battery wand connector, solar panel lead, or low-voltage adapter before touching the brackets. If your blind uses a removable battery wand, take it off first if the design allows it.
- Inspect the mounting style: Look behind the headrail for spring clips, hinged bracket doors, retention tabs, or small screws. Many smart blinds use the same basic bracket layout as motorized roller or cellular blinds, but the motor side is usually bulkier.
- Remove the valance or fascia if fitted: Some smart blinds have a decorative fascia that snaps over the headrail and hides the motor and brackets. Use a plastic trim removal tool if needed and pop the cover off gently instead of forcing it.
- Support the headrail with one hand: Before releasing any bracket, keep one hand under the blind or have a second person support the opposite side. This is especially important on the motor side, where the added weight can make the blind tilt suddenly.
- Release the bracket clip or locking tab: Use a flat tool or screwdriver only where needed. Some smart blind brackets open by pushing a tab upward or outward, while others have a hinged face that swings open. Work slowly so the headrail does not twist.
- Free one side first, then slide or lower the other side out: Once the first bracket lets go, keep the blind level and gently ease the second side free. If the motor housing sits tightly in the bracket, wiggle it slightly instead of pulling hard.
- Lower the blind carefully: Bring the blind down with both hands and set it on a clean surface. Avoid resting the full weight on the charging port, battery connection point, or antenna housing.
- Remove the brackets if you are replacing or relocating the blind: Use a screwdriver or drill only after the blind is off the wall or frame. You can compare smart blind mounting brackets if the originals are bent or stripped.
- Label the motor side and hardware: If you plan to reinstall the blind later, mark which end contains the motor and store screws, clips, charger parts, and bracket covers together. This makes reinstallation much easier.

Vercraft 2 Pcs Vertical Blind Wand Control Replacement Repair Accessories White Window Blinds Replacement Parts
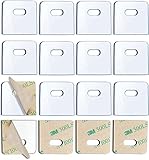
SOGEWO (16 Set/32 Pieces) Clear Vertical Blind Repair Tabs, Vertical Blinds tabs/Blind Fixers for Vertical Blinds Replacement Slats & Parts

60 PCS Vertical Blind Repair Tabs Kit Clear Fixer Verticle Blinds Snap in Replacement Slats Parts Panels
Common Problems When Taking Down Smart Blind
- The headrail will not release from the bracket: This usually means there is a hidden locking tab, fascia clip, or retaining screw still in place. Check the motor side especially carefully because smart blind brackets often hold that end more tightly.
- The motor side feels stuck: Some smart blinds fit snugly where the drive pin or motor housing enters the bracket. Do not force it down. Instead, support the blind level and gently slide or wiggle the motor side out.
- The fascia or valance will not come off: Decorative covers on smart blinds can clip in more tightly than manual blind valances. A non-marring pry tool helps reduce the risk of cracking the cover.
- The charger cable or battery wand gets in the way: Remove detachable power accessories before taking down the blind. If the connector is tight, do not yank the wire itself; grip the connector body and pull it straight out.
- The blind starts to twist during removal: This is common on wider smart roller blinds and dual-shade systems. The fix is to support both ends at the same time and keep the headrail level while the brackets release.
- Bracket screws are stripped or painted over: If you are removing the whole mounting setup, a small screw extractor set may be useful for damaged screws.
- The blind no longer responds before removal: Even if the smart blind is unresponsive, you can still remove it manually by identifying the bracket type and supporting the motorized headrail carefully. Lack of power does not usually lock the blind permanently in place.
- You are not sure which parts need replacing: If the blind came down because of a broken clip, cracked bracket, or damaged battery mount, compare the hardware with replacement parts for smart blinds before reinstalling anything.
What to Do After Removing Smart Blind
- Inspect the motor side first: Check the drive end, battery connection, charger port, and end cap for cracks or looseness. These are the most important areas to examine after removal.
- Check the brackets and clips: If the blind was difficult to remove, the real problem may have been a bent or damaged bracket rather than the blind itself. Compare the old pieces with smart blind brackets and clips if you need replacements.
- Clean the headrail and sensors: Dust around the motor housing, light sensor, or charging contacts can affect operation. Wipe the blind gently with a dry microfiber cloth before storing or reinstalling it.
- Store the blind in a safe position: Lay it flat on a clean surface and avoid placing weight on the motor end, battery wand, or fascia. Do not stand a smart roller blind upright on the motor cap.
- Keep all hardware together: Place screws, clips, charging adapters, battery holders, and remote mounting pieces in one labeled bag so reinstallation is easier later.
- Test whether repair is enough before replacing the whole blind: Many smart blind issues come from worn brackets, failed chargers, loose battery wands, or damaged mounting hardware rather than a ruined blind. That is why it helps to inspect parts carefully first.
- Prepare for reinstalling or servicing the blind: If you plan to put it back up soon, make sure you still have the charger, remote, and any setup instructions. If the blind needs repair, it may also help to compare common motor and power-related replacement parts.

Motorized Blinds No Drill Automatic Blinds for Windows Cordless Roller Shades Electric Blinds with Remote Control Smart Blinds (White, 34.5 x 72)

SwitchBot Blind Tilt Motorized Blinds - Smart Electric Blinds, Automatic Blind Opener and Closer, Solar Powered, Light Sensing Control, Add Hub Mini to Make it Compatible with Alexa & Google Home

SwitchBot Smart Electric Motorized Blinds Kit - 3Pack with 2.4G WiFi Remote Control, Solar Powered, Compatible with Alexa, Google Home and Siri, Light Sensing Control, Unlimited Group Control
Smart Blind Removal FAQ
How do you remove smart blinds without damaging the motor?
Raise the blind fully first, disconnect any charger or battery accessory, support the headrail with both hands, and release the bracket clips slowly. The key is to keep the motor side supported so it does not drop or twist.
Do smart blinds come down the same way as regular blinds?
Not always. Many smart blinds use similar brackets, but the headrail is usually heavier because of the built-in motor, battery pack, or control housing. That means you need to be more careful when releasing the first bracket.
Should I disconnect the battery before taking down smart blinds?
Yes, if your blind has a removable battery wand, charger cable, solar panel lead, or external power adapter, disconnect it before removal. This helps prevent wire strain and makes the blind easier to handle.
Why is the motor side of my smart blind stuck in the bracket?
The motor side often fits more tightly because the drive housing or pin sits inside the bracket more firmly than the idle side. Keep the blind level, release the locking tab fully, and slide or wiggle the motor side out gently rather than forcing it straight down.
Can I remove smart blinds by myself?
Yes, smaller smart blinds can often be removed by one person, but wide or heavy blinds are safer with two people. A second person helps keep the headrail level and reduces the chance of twisting the motor side during removal.
What tools are best for taking down smart blinds?
A stable step stool, a small screwdriver, and plastic pry tools are usually enough. Those tools help with retaining clips, bracket covers, and fascia pieces without damaging the finish.
What should I do if my smart blind will not release from the bracket?
Check for a hidden locking tab, retention screw, or fascia clip that still needs to be removed. Do not pull hard on the headrail. Instead, support the blind and identify exactly how the bracket opens.
Can I reinstall the same smart blind after taking it down?
Yes, as long as the brackets, clips, and motor housing are still in good condition. Store the blind carefully, keep the hardware together, and inspect the mounting points before reinstalling it.
Summary
Taking down smart blinds safely comes down to three things: disconnecting any power accessory first, supporting the motorized headrail properly, and releasing the brackets without twisting the heavier motor side. Once the blind is down, inspect the brackets, power components, and motor end before deciding whether you need replacement hardware, reinstallation, or a repair. If the blind needs servicing after removal, it is also worth checking options to repair Smart blinds before replacing the whole setup.
60 PCS Vertical Blind Repair Tabs Kit Clear Fixer Verticle Blinds Snap in Replacement Slats Parts Panels

30 Sets (60 Pcs) Vertical Blinds Replacement Slats Panels, Vertical Blind Repair Tabs Kit, Clear Apartment Blinds Replacement Fixers, Horizontal Blinds Replacement Parts
