

If you need to remove sheer blinds without snagging the delicate fabric or damaging the roller mechanism, the safest approach is to lower the blind into a relaxed position, support the tube evenly, and release the brackets without twisting the fabric or pulling on the control chain. Sheer blinds are lighter and softer than blackout fabrics, but that also means the material can wrinkle, pull, or shift more easily if the blind is handled roughly during removal. This guide walks through how to take down sheer blinds step by step while protecting the clutch, idle end, chain loop, and fabric wrap. If you think you may need replacement hardware afterward, it also helps to review Sheer blind parts before you begin.
What You Need Before Removing Sheer Blind
- A stable step stool or ladder: Sheer blinds are often installed high above the window recess, and you need steady access to release the brackets without dropping the roller or pulling the fabric sideways.
- A small screwdriver: Many sheer blind brackets use a spring tab, retaining flap, or compact release clip, so a precision screwdriver set can make removal cleaner and safer.
- Needle-nose pliers: A pair of needle-nose pliers can help if the idle-end pin is tight or a bracket tab is awkward to grip by hand.
- A clean flat surface or soft cloth: Once the blind is down, you need somewhere clean to place it so the sheer fabric does not pick up dirt, snag, or crease.
- A soft tie or fabric strap: Use this to keep the blind rolled after removal. Do not tie the blind too tightly, because pressure can leave marks in the fabric or flatten the wrap.
- A small container for screws and covers: Bracket caps, screws, end fittings, and chain safety pieces are easy to lose once the blind is off the wall or frame.
- Optional replacement parts on hand: If the blind already feels loose or rough in operation, it may help to compare sheer blind parts, roller shade clutch replacements, or roller shade mounting brackets before you begin.
Sheer Blind Removal Guide
Removing a sheer blind is usually straightforward once you identify which side holds the clutch and which side uses the idle-end pin, but the fabric needs gentle handling because sheer materials can crease, pull, or wrinkle more easily than heavier blind fabrics. The safest method is to support the roller tube, release the control side carefully, then free the opposite end without letting the blind drop or unwind. Always handle the blind by the roller tube or cassette rather than by pulling on the sheer fabric itself.
- Lower the sheer blind to a relaxed position: Bring the blind down far enough that the fabric is not wound tightly around the tube. This reduces tension and makes the roller easier to control during removal.
- Check that the fabric is wrapping evenly: Before taking the blind down, make sure the sheer material is sitting straight on the tube. If the wrap already looks uneven, straighten it gently before releasing the brackets.
- Inspect the bracket type first: Look at both ends of the blind and identify the control side with the chain and the opposite idle-end side. Most sheer blinds use roller-style hardware, but the exact bracket clip can vary by brand.
- Remove any fascia, cassette cover, or bracket caps: If your sheer blind has a front cover hiding the hardware, remove it first so you can reach the bracket tabs and release points clearly.
- Support the roller tube with one hand: Before releasing any bracket, hold the roller tube or cassette firmly. Do not hold the weight of the blind by the fabric alone, because that can stretch the material or disturb the wrap.
- Release the control-side bracket carefully: Use your fingers or a small screwdriver to press the retaining tab or open the bracket clip on the chain side. This is usually the tighter side and the one that needs the most control.
- Ease the clutch end out slightly: Once the tab releases, pull the clutch side forward just enough to disengage it. Keep the blind level so the opposite side remains supported.
- Free the idle-end side: Compress, lift, or slide the idle-end pin out of its bracket depending on the fitting style. If it feels stuck, avoid twisting the roller hard to force it free.
- Remove the blind evenly: Bring the blind away from the wall or frame in a smooth, level motion. Wider sheer blinds can still feel awkward to handle because of the width of the roller tube.
- Lay the blind down and secure it loosely: Place it on a clean surface and use a soft tie to keep the blind rolled without crushing the fabric or leaving pressure lines.
- Inspect the hardware while the blind is down: Check the clutch, chain, idle end, and brackets for wear. If something looks damaged, compare roller shade clutch replacements, bead chain replacements, and sheer blind repair kits before reinstalling.

60 PCS Vertical Blind Repair Tabs Kit Clear Fixer Verticle Blinds Snap in Replacement Slats Parts Panels
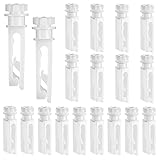
Leinuosen 12 Pieces Vertical Blind Clips Stems Replacement Parts
Common Problems When Taking Down Sheer Blind
- The control-side bracket will not release: Many sheer blind brackets have a small spring clip or hidden retaining tab, so check the bracket carefully before trying to force the roller forward.
- The fabric starts unwinding as the blind comes down: This usually happens when the tube is not supported evenly. Hold the blind by the roller tube and keep the fabric aligned as you remove it.
- The idle-end pin feels stuck: Some non-control ends need to be compressed slightly inward before they lift free. Avoid twisting the roller aggressively, because that can disturb the fabric wrap.
- The sheer fabric wrinkles or creases after removal: This can happen if the blind is tied too tightly or placed on a rough surface. Sheer material is light and airy, but it can mark easily if stored carelessly.
- The chain or clutch already looks worn: This is often easier to spot once the blind is down. If needed, compare replacement bead chains and clutch replacements before reinstalling the same blind.
- The fascia or cassette cover is difficult to remove: Some covers pull forward first, while others clip upward or downward. Forcing them can crack the tabs and make reinstallation harder.
- The blind feels awkward because of its width: Even though sheer fabric is light, a wider blind can still be difficult to control if one side drops before the other. Support both ends evenly during removal.
What to Do After Removing Sheer Blind
- Lay the blind on a clean, flat surface: The fabric should not be left on a dusty floor or rough surface. Keeping it flat helps prevent snags, edge damage, and wrinkles.
- Straighten the fabric wrap before storing: If the sheer material has shifted sideways, adjust it gently now so the blind does not develop an uneven roll while stored.
- Inspect the clutch, chain, and idle end: This is the best time to check for wear. If needed, compare clutch replacements, replacement chains, and mounting brackets.
- Clean dust from the brackets and chain path: If you plan to reinstall the same blind, cleaning the hardware now can help the mechanism operate more smoothly later.
- Store the blind loosely rolled and protected: Avoid placing heavy items on top of it. Sheer blind fabric can wrinkle or distort if it is stored badly.
- Bundle the chain safely: Wrap the bead chain loosely so it does not knot, snag, or pull against the control mechanism during storage.
- Decide whether to repair or replace: If removal exposed worn hardware or damaged fabric edges, compare sheer blind options with parts costs before reinstalling the same blind.
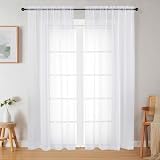
WelvetBLK White Sheer Curtains 84 Inches Long 2 Panels Set for Bedroom Living Room, Soft Airy Light Filtering Modern Solid Rod Pocket Drapes Window Treatments, White, Each 42" W x 84" L

Persilux Cordless Zebra Blinds for Windows Free-Stop Window Blinds (34" W X 64" H, White) Dual Layer Light Control for Day and Night, Light Filtering Sheer Shades for Home, Bedroom, Easy to Install

CHICOLOGY Panel Track Blinds, Sheer, 78"x84", Cordless, Sliding Glass Door
Sheer Blind Removal FAQ
Do I need to lower sheer blinds before removing them?
Yes. Lowering the blind into a more relaxed position reduces tension on the fabric wrap and makes the roller easier to support while you release the brackets.
Which side should I release first on a sheer blind?
In most cases, release the control-side clutch bracket first while supporting the roller tube, then free the idle-end side second. That usually keeps the blind more level and easier to control.
Can the fabric get damaged during removal?
Yes. If the blind is pulled by the fabric, dropped unevenly, or tied too tightly after removal, the material can wrinkle, pull, or shift out of alignment. Always support the roller tube instead of the fabric.
Why will my sheer blind not come out of the bracket?
The most common reasons are a hidden retaining tab on the control side, a tight spring clip, or an idle-end pin that still needs to be compressed slightly before lifting free.
Should I remove the chain before taking the blind down?
Not usually. In most cases, the chain can stay attached unless you are also replacing the clutch, chain loop, or safety device at the same time.
What if the clutch looks worn after I remove the blind?
That is actually the best time to replace it, because the blind is already down and the hardware is easier to inspect. Matching the clutch to the tube size and control side is the important part.
Can I reinstall the same sheer blind after taking it down?
Yes, as long as the brackets, clutch, idle end, and fabric are still in good condition. Removal is a useful chance to inspect the hardware and clean the blind before putting it back up.
Are sheer blinds removed the same way as standard roller blinds?
In many cases, yes, because sheer blinds often use roller-style bracket systems. The main difference is that the lighter fabric needs gentler handling so it does not wrinkle or pull out of alignment during removal.
Summary
Removing sheer blinds safely is mostly about supporting the roller tube correctly, releasing the control-side bracket with care, and protecting the lighter fabric from wrinkling, twisting, or shifting while the blind comes down. Once the blind is off the window, you can inspect the clutch, chain, idle end, and brackets, clean the hardware, and decide whether it is ready to go back up or needs replacement parts first. If the removal turns into a repair project, it also helps to review repair Sheer blinds before reinstalling the blind.
60 PCS Vertical Blind Repair Tabs Kit Clear Fixer Verticle Blinds Snap in Replacement Slats Parts Panels
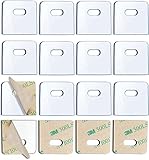
SOGEWO (16 Set/32 Pieces) Clear Vertical Blind Repair Tabs, Vertical Blinds tabs/Blind Fixers for Vertical Blinds Replacement Slats & Parts
