
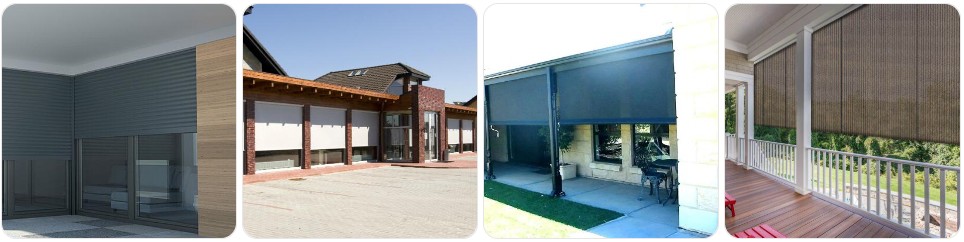
If you need to remove outdoor blinds without tearing the fabric, bending the side channels, or damaging the roller tube and mounting hardware, the safest approach is to lower the blind fully, release any guide or anchor points first, and then remove the top roller assembly while supporting its weight evenly. Outdoor blinds are usually heavier and more weather-exposed than indoor blinds, so they often have stronger brackets, tension anchors, side tracks, bottom bars, or crank and strap mechanisms that need a more controlled removal process. This guide walks through how to take down outdoor blinds step by step while protecting the fabric, tube, bottom bar, guides, and mounting hardware. If you think you may need replacement hardware afterward, it also helps to review Outdoor blind parts before you begin.
What You Need Before Removing Outdoor Blind
- A sturdy ladder or two-person access setup: Outdoor blinds are often mounted higher than indoor blinds and may be fixed to pergolas, verandas, patios, or exterior frames, so safe access matters even more than usual.
- A drill/driver or screwdriver set: Outdoor blind brackets are often fastened more securely than indoor blind brackets. A cordless drill/driver or screwdriver set is often necessary for removing exterior screws or support plates.
- Needle-nose pliers or adjustable pliers: These help with tight retaining clips, split pins, or small locking pieces that may hold the blind in its brackets or guide system. A pair of needle-nose pliers is useful for smaller hardware.
- A clean tarp, sheet, or protected surface: Once the blind is down, place it on a clean surface so the outdoor fabric, mesh, or PVC material does not get scratched or pick up dirt from the ground.
- A soft tie or storage strap: This helps keep the blind rolled neatly once removed. Do not cinch the material too tightly, especially if it is a clear PVC or mesh outdoor blind that can crease.
- A container for screws, anchors, clips, and bracket covers: Outdoor blind hardware is easy to lose during removal, especially if you are working outside in wind or on a deck or patio area.
- Optional replacement parts on hand: If the blind already has worn hardware, you may want to compare outdoor blind parts, roller shade mounting brackets, blind strap replacements, or roller blind crank handles before you start.
Outdoor Blind Removal Guide
Outdoor blind removal is usually a little more involved than removing an indoor blind because the unit is often larger, heavier, and fixed more firmly to handle weather, wind, and repeated outdoor use. The safest method is to lower the blind completely, release any bottom anchors, guide wires, straps, or side channels first, and then remove the top roller or cassette while another person helps support the weight if the blind is wide. Avoid trying to pull the blind down while it is still partly tensioned, because outdoor systems can put a lot of strain on the tube, fabric edges, and brackets when they are not released in the right order.
- Lower the outdoor blind fully: Bring the blind all the way down so the material is not tightly wound under tension. This helps reduce strain on the roller tube and makes the blind easier to control during removal.
- Release bottom straps, anchors, or tie-downs first: Many outdoor blinds have bottom buckles, straps, clips, or anchor points to stop movement in wind. Undo those first before touching the upper hardware.
- Check for side channels, guide wires, or zip-track style edges: Some outdoor blinds slide in channels or run along guide wires. Identify how the blind is held in place before you try to lift the main roller out of its brackets.
- Remove any crank handle, control wand, or detachable operating piece: If the blind uses a removable crank or handle, take that off and store it safely before continuing.
- Inspect the bracket style at the top: Outdoor blinds may use face-fix brackets, top-fix brackets, cassette mounts, or heavier spring-retained supports. Look for locking pins, retaining tabs, or screws that keep the roller in place.
- Support the roller tube or cassette before undoing hardware: Outdoor blinds are often much heavier than they look, especially if the material is weatherproof PVC or a dense mesh. Do not let one side drop first, or the tube can twist and damage the blind.
- Undo the first bracket or retaining clip carefully: Use your drill/driver or screwdriver to remove the first fixing point while another hand or second person supports the blind.
- Release the second side while keeping the blind level: Once the first side is loose, keep the tube steady and remove the second bracket, clip, or locking pin without letting the weight swing outward.
- Lift the outdoor blind clear in one smooth motion: Remove the roller assembly, cassette, or upper housing evenly and bring it down carefully. On wider outdoor blinds, two-person handling is usually the safest option.
- Lay the blind on a clean surface immediately: Set the blind on a tarp, sheet, or protected floor area so the fabric, mesh, or clear panel does not scrape against concrete or decking.
- Roll and secure the blind loosely for storage: Keep the material neat and straight as you roll it. If the edges telescope or shift, correct them before fastening with a soft tie or strap.
- Inspect the hardware while everything is accessible: Once the blind is down, check the brackets, bottom bar, guides, crank system, straps, and fixings. If anything looks worn, compare outdoor blind parts, mounting brackets, crank handles, and strap replacements.

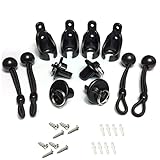
Universal Replacement Installation Accessories for Indoor/Outdoor Sunshade and Roller Blinds(Crodless Bracket)

Lihopefe Roller Blind Installation Bracket Replacement Parts
CACELY Coolaroo Replacement Parts Bungee End Cap Kit Black for Coolaroo Exterior Cordless Roller Shades Outdoor Blinds(2 Set)
Common Problems When Taking Down Outdoor Blind
- The blind feels heavier than expected: This is very common with outdoor blinds because the roller tube, bottom bar, and weather-resistant material add weight. Wider blinds often need a second person for safe removal.
- Bottom anchors or straps are hard to release: Outdoor hardware may be stiff from weather exposure. Work them loose carefully rather than yanking, especially if the fittings are plastic or sun-aged.
- The side channels are still holding the blind: If the blind uses side tracks or a zip-style edge, it may not come free just because the top brackets are loose. Make sure the blind is fully disengaged from the guide system first.
- The bracket screws are rusted or tight: Exterior fittings often seize over time. A proper drill/driver or hand tool is safer than forcing the screw head and stripping it.
- The fabric starts folding or creasing badly during removal: Outdoor blind material can crease if the roller is allowed to unwind unevenly. Support the tube and keep the material aligned as you lower it.
- The crank or operating mechanism looks worn once the blind is down: This is a common issue with outdoor systems exposed to weather. If so, compare crank handle replacements and outdoor blind parts before reinstalling.
- One side drops before the other: This usually means the first bracket was released before the second side was properly supported. Stop and steady the tube before continuing, because outdoor blind tubes can bend if dropped unevenly.
What to Do After Removing Outdoor Blind
- Lay the blind flat or store it upright safely: Keep the material off rough ground and away from sharp edges so the outdoor surface does not get scratched, punctured, or creased.
- Clean the blind before storing it: Outdoor blinds collect dust, pollen, moisture residue, and exterior grime. Cleaning it while it is already down makes later reinstallation much easier.
- Inspect the brackets, anchors, and bottom fixings: Check whether the exterior hardware is corroded, bent, or worn. If needed, compare mounting brackets and outdoor blind parts.
- Check the fabric edges and bottom bar: Outdoor blinds often wear at the side seams, hems, and bottom weight bar. Catching that damage early can prevent a bigger reinstall problem later.
- Bundle straps, chains, or control parts neatly: Keep any detachable control pieces together so they do not get lost during storage.
- Store the blind in a dry, protected place: Even outdoor-rated blinds should not sit loosely in damp storage if you want to avoid mildew, warped components, or extra wear while off the structure.
- Decide whether to repair or replace: If removal exposed cracked fixings, worn side guides, or badly damaged material, compare outdoor blind options with the cost of replacement parts before putting the blind back up.
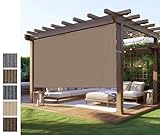
Outdoor Roller Shades,Exterior Cordless Patio Shade Roll Up Blind for Porch

Artpuch Outdoor Roller Shade 8' W x 8' H, Gray Exterior Cordless Patio Shades Roll Up Blinds with Spliced Pole Design, (2 Poles, One-Piece Fabric)

Shade&Beyond Outdoor Roller Shades with Splicing Design, 8' W x 8' H Cordless Patio Roll Up Blinds, Exterior Shade Cloth Roll for Porch, Gazebo, Pergola, Balcony, Mocha
Outdoor Blind Removal FAQ
Should I lower an outdoor blind fully before removing it?
Yes. Lowering it fully helps reduce tension on the roller and makes it easier to release bottom anchors, straps, and brackets in the right order.
Do outdoor blinds usually need two people to remove?
Often, yes. Wider outdoor blinds can be heavy because of the tube, bottom bar, and weather-resistant material, so a second person makes removal much safer.
Why will my outdoor blind not come out of the top brackets?
The most common reasons are retaining clips, locking pins, rusted screws, or a guide system that is still holding the blind in place. Make sure the bottom and side restraints are fully released first.
Can side channels keep the blind from coming down?
Yes. Outdoor blinds with side channels, guide wires, or zip-style edges may still be restrained even after the top hardware is loosened, so those guide points need to be checked carefully.
Should I remove the crank handle before taking down the blind?
Yes, if it is detachable. Removing the crank or operating handle first makes the blind easier to handle and reduces the chance of bending or losing the control piece.
Can I reinstall the same outdoor blind after removing it?
Yes, as long as the fabric, roller tube, brackets, and exterior fittings are still in good condition. Removal is also a good chance to clean the blind and replace worn hardware before reinstalling.
Is it better to repair an outdoor blind while it is off the structure?
Usually, yes. It is much easier to inspect the bottom bar, crank system, side edges, brackets, and mounting points when the blind is already down and fully accessible.
Are outdoor blind parts universal?
Not always. Brackets, crank systems, bottom bars, side channels, and guide hardware can vary a lot by brand and design, so it is best to compare the original parts before ordering replacements.
Summary
Removing outdoor blinds safely is mostly about releasing the bottom restraints first, supporting the roller or cassette evenly, and taking the blind down without twisting the tube or creasing the outdoor material. Once the blind is off the structure, you can clean it, inspect the brackets and control hardware, check the fabric edges, and decide whether it is ready to reinstall or needs replacement parts first. If your removal project turns into a repair job, it also helps to review repair Outdoor blinds before putting the blind back up.

60 PCS Vertical Blind Repair Tabs Kit Clear Fixer Verticle Blinds Snap in Replacement Slats Parts Panels

#560 Universal Roller Shade Replacement Parts, Roller Blind Fitting Repair Kit for 1.5"(38mm) Tube with R16 Clutches, Metal Bracket, and End Plug
