
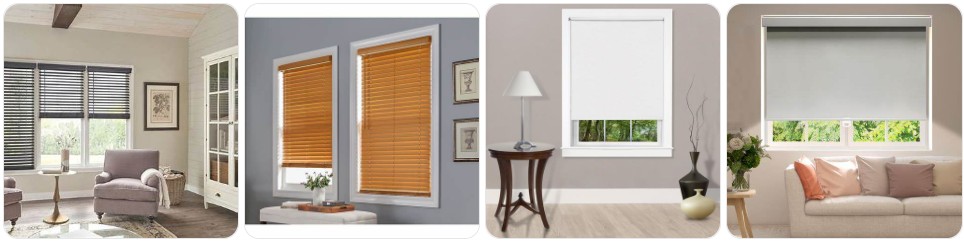
Removing cordless blinds is usually straightforward once you know where the hidden mounting brackets and release tabs are. The quick answer is that most cordless blinds come down by first fully raising the shade, locating the spring-loaded bracket clips or rear hooks, then gently tilting the headrail out of the brackets without forcing the cordless lift mechanism. If you are also trying to identify replacement hardware before removal, it helps to check Cordless blind parts so you know which clips, brackets, and handles may need attention afterward.
What You Need Before Removing Cordless Blind
- A stable step ladder: Cordless blinds are often mounted tightly inside the window recess, so you need enough height to see the back of the headrail and reach both mounting brackets evenly.
- A flat screwdriver or putty knife: Many cordless blind brackets use a front release tab or a tight spring clip. A thin tool helps you press the tab without bending the headrail. A thin putty knife for blinds is often easier to slide into narrow bracket gaps than a bulky screwdriver.
- Needle-nose pliers: Useful if the bracket clip is stiff, the valance insert is stuck, or a small retaining pin is hard to grip. A basic pair of needle-nose pliers can help without putting too much pressure on the cordless lift housing.
- A second person for wide cordless blinds: Wider cordless blinds can twist when one side comes loose first. Extra support helps protect the internal spring system and keeps the headrail from dropping suddenly.
- Painter’s tape or small labels: Helpful for marking left and right brackets if you plan to reinstall the same cordless blind later, especially when the brackets look similar but are not perfectly interchangeable.
- A soft blanket, towel, or large table: Once removed, place the blind on a protected surface so the bottom rail, cordless handle, and fabric or slats do not get scratched.
- A small container for screws and clips: Cordless blind hardware is easy to misplace. Keep bracket screws, spacer blocks, and valance clips together as soon as you take them down.
- Good lighting: Cordless blind release tabs are often hidden behind the front lip of the headrail. A bright work light or small LED work light makes it much easier to see exactly where the bracket locks are.
Cordless Blind Removal Guide
Cordless blinds should always be removed slowly and evenly because the lifting mechanism is built inside the headrail or bottom rail rather than controlled by an exposed cord. The biggest mistake is pulling down on the blind body instead of releasing the brackets first. Never force the headrail forward until you know whether your cordless blind uses snap-in brackets, hinged covers, or hidden rear hooks. On many cordless cellular, pleated, mini, and faux wood blinds, the blind comes out cleanly once the front tab is depressed and the headrail is rolled forward.
- Raise the cordless blind completely before touching the brackets: This reduces weight on the headrail and protects the internal spring or tension mechanism. For cordless cellular shades, collapse the fabric stack fully. For cordless slatted blinds, raise the bottom rail all the way up and keep the slats level.
- Remove any valance or decorative cover first: Many cordless faux wood and mini blinds have a front valance that hides the brackets. Slide it upward, pop it off the valance clips, or gently pry the clips loose. If the clips are brittle, a set of replacement blind valance clips can be useful to have on hand.
- Locate the bracket style used on your cordless blind: Most cordless blinds use one of these setups: front snap-in brackets with a locking tab, box brackets with a hinged door, or hidden rear hooks that release when the headrail tilts forward. Check both ends and the center support bracket on wider blinds.
- Support the headrail with one hand while releasing the first bracket: Keep upward pressure on the blind so the bracket does not bind. Use your flat screwdriver or putty knife to press the small metal or plastic tab. On some cordless blinds you press the tab upward; on others you pull it outward slightly.
- Roll or tilt the front of the headrail toward you: Once the front clip releases, the blind usually pivots out from the front first while the rear lip stays hooked in place. Do this gently rather than yanking. If it does not move, stop and check for a second locking point.
- Move to the opposite bracket and repeat the release: Keep the blind level while unlocking the second side. On wide cordless blinds, ask a helper to support the loose end so the headrail does not twist and stress the internal lift mechanism.
- Lift the rear of the headrail up and out of the bracket hooks: After the front edge is free, most cordless blinds come out by lifting slightly and pulling the back lip away from the bracket. This is the step where many people bend the headrail, so use steady, even pressure only.
- Check for a center support bracket before fully lowering the blind: Wider cordless blinds often have a middle bracket that still holds the headrail even after both ends are loose. Release it the same way before attempting to take the full blind down.
- Carry the blind with two hands by the headrail, not the fabric or bottom rail: Cordless cellular and pleated shades can crease if lifted by the fabric stack. Cordless wood-look blinds can also go out of alignment if carried by one end only.
- Set the blind on a clean surface and inspect the hardware immediately: Look for cracked bracket tabs, bent clips, worn handles, or loose end caps. If anything looks damaged, compare options like cordless blind brackets, cordless blind handles, or cordless shade repair kits before reinstalling it.
- Unscrew the brackets only if you are removing the entire mounting hardware: If the blind is being replaced, use a drill or screwdriver to remove the mounting screws, spacer blocks, and any extension brackets after the blind itself is safely off.

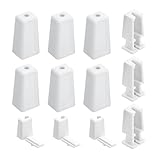
20 Pcs Vertical Chain Connector for Roman Blinds Replacement Clips for Chain and Cord(Plastic,Classic)

6 Pack Graber Bali Springs Cordless Honeycomb Shade Lift Handles(Made After 2015) - Cordless Shade Handle Bali Blinds Replacement Parts for Top Down Bottom up 3/4" Pleat Mini Blinds Cellular Shades
DuckcowsC Blind Cord Stop Replacement Kit Compatible with Hunter Douglas, Includes Cord Stop Housing and Knob, fits Honeycomb Shades (Duette/Applause Style), White, 3-Pack
Common Problems When Taking Down Cordless Blind
- The blind will not unclip from the bracket: This usually means the release tab is being pressed from the wrong angle or the headrail is still carrying weight. Push the headrail upward slightly first, then press the tab again.
- You cannot see the mounting brackets: Cordless blinds often hide them behind a valance, fabric stack, or tight inside mount. Use a flashlight and look from below and from the side before prying anywhere.
- The center bracket is still holding the blind: This is very common on wider cordless blinds. People release both end brackets and assume the blind should fall free, but the center support is still locked in place.
- The headrail feels stuck to the wall or frame: Paint, dust, or long-term compression can make cordless brackets cling. Slip a plastic putty knife behind the headrail instead of using force that could dent metal components.
- The cordless bottom rail drops unevenly after removal: That can happen if the blind was already out of balance internally. Keep the blind fully raised and secured on a flat surface until you inspect it.
- Bracket tabs snap during removal: Older plastic hardware can become brittle from sun exposure. It is smart to keep an eye on replacement blind brackets if your cordless blind is several years old.
- The valance clips break first: This is especially common on cordless faux wood blinds where the valance must come off before you can reach the brackets. Work each clip one at a time instead of pulling the whole valance straight out.
- The fabric creases on cordless cellular shades: This happens when the shade is carried by the pleated fabric rather than the headrail. Always hold the rigid top section, not the stacked cells.
- The blind twists during removal: Wide cordless blinds can rack when one side is released early. Support both ends and keep the headrail level to avoid bending.
- Screws spin but do not come out: If you are also removing the brackets, the screw may be stripped or set in a wall anchor. Use steady reverse pressure or switch to pliers or a screw extractor if needed.
What to Do After Removing Cordless Blind
- Inspect the headrail and brackets for wear: Check for bent metal, cracked clip doors, missing end caps, and worn mounting holes. Cordless blinds depend on accurate bracket alignment, so even small damage can make reinstallation harder.
- Clean dust from the top rail and bracket pockets: Built-up dust often interferes with smooth reinstallation. A small handheld vacuum for blinds or soft brush helps remove dirt without damaging the finish.
- Label and bag all cordless hardware: Keep left, right, and center brackets together with their screws. This saves a lot of time if you reinstall the same blind later.
- Store the blind fully raised: Cordless cellular and pleated shades store best when collapsed neatly. Cordless slatted blinds should be stacked evenly with the bottom rail supported.
- Check whether the problem was actually the blind or the mounting hardware: Sometimes a cordless blind seems faulty when the real issue is a bent bracket or misaligned install position.
- Measure the bracket spacing before replacement: If you plan to install a new cordless blind, record the old mounting width, bracket depth, and screw-hole positions before patching anything.
- Patch and clean the mounting area if the blind is being replaced: Remove old anchors, fill wall damage if needed, and wipe away dust so the next installation sits level.
- Order replacement parts before reinstalling the blind: Common items include cordless blind replacement parts, inside-mount shade brackets, and blind repair kits if the original hardware looks worn.
- Test the cordless mechanism before reinstalling: While the blind is off the wall, gently check that the bottom rail raises and lowers evenly and that the headrail is not bowed.
- Decide whether repair makes more sense than replacement: If the blind still looks good and only the mounting clips or internal guides are worn, repairing it is often cheaper than buying an entirely new cordless blind.
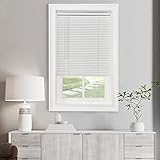
Cordless Light Filtering Mini Blind - 27 Inch Width, 64 Inch Length, 1" Slat Size - Pearl White - Cordless GII Morningstar Horizontal Windows Blinds for Interior by Achim Home Decor

Lotus & Windoware Cordless, 2 Inch Faux Wood Blind, 34" Wide x 60" Long, Window Blinds, Blinds & Shades, Blinds for Indoor Windows, Embossed, Bright White
Cordless Light Filtering Mini Blinds for Indoor Windows - 29 Inch Width, 64 Inch Length, 1" Slat Size - Pearl White - Cordless GII Morningstar Window Blinds for Interior by Achim Home Decor
Cordless Blind Removal FAQ
Do you remove cordless blinds the same way as corded blinds?
No. The main difference is that cordless blinds often hide their mounting hardware more tightly and must be supported carefully so the internal lift mechanism is not strained during removal.
Should the cordless blind be up or down when removing it?
It should usually be fully raised first. That reduces weight on the brackets and makes it easier to remove the headrail without damaging the cordless lift system or fabric stack.
Why is my cordless blind stuck in the bracket?
The release tab may still be under tension, the rear lip may still be hooked into the bracket, or there may be a hidden center support bracket holding the blind in place.
Can I take down cordless cellular shades without tools?
Sometimes, yes, especially if the brackets have easy-release tabs. But a thin flat screwdriver or putty knife usually makes the job safer and helps prevent bent brackets or damaged fingernails.
Do I need to remove the valance first on cordless faux wood blinds?
In many cases, yes. The valance often blocks access to the mounting clips, so removing it first makes it much easier to see and release the headrail properly.
What if one side of the cordless blind comes out but the other side will not move?
Keep the loose side supported and check for a second locking tab, a center bracket, or a rear hook that still needs to be lifted free. Do not twist the headrail to force the remaining side out.
Can removing cordless blinds damage the internal spring mechanism?
Yes, if the blind is pulled by the bottom rail, dropped on one side, or twisted sharply during removal. Supporting the headrail evenly is the best way to avoid that problem.
What replacement items are most commonly needed after taking down cordless blinds?
The most common items are mounting brackets, valance clips, end caps, handles, and occasionally a cordless shade repair kit if the blind was already lifting unevenly before removal.
Summary
Taking down cordless blinds safely mostly comes down to raising the blind fully, identifying the correct bracket style, releasing the front clips carefully, and supporting the headrail evenly as it tilts free. Because cordless blinds hide their operating system inside the blind, gentle handling matters much more than brute force. Once the blind is off, inspect the hardware, store the blind properly, and replace any worn clips or brackets before reinstalling. If removal has shown that the blind needs more than just bracket attention, the next step is to repair Cordless blinds so you can decide whether a repair kit or specific replacement part is the better fix.

60 PCS Vertical Blind Repair Tabs Kit Clear Fixer Verticle Blinds Snap in Replacement Slats Parts Panels

Vertical Blind Repair Vane Savers, 12PCS Metal Vertical Blind Repair Tabs, Vertical Blinds Repair Kit for Vertical Blinds Replacement Slats
