
Removing Daylight blinds is usually straightforward once you identify how the headrail is locked into the brackets and make sure the fabric is fully aligned before you start. In most cases, the safest method is to raise or position the blind so the fabric is not twisted, release the bracket tabs carefully, and support the headrail evenly as you take it down. If you are removing the blind because a clip, bracket, chain, or fabric guide has worn out, it also helps to check Daylight blind parts before you begin so you know whether the blind needs to come down for a simple part swap or a full replacement.
What You Need Before Removing Daylight Blind
- A stable step stool or ladder: Daylight blinds are often fitted tightly inside a recess or high above the window frame, so you need safe access to the brackets on both sides of the headrail.
- A small flathead screwdriver or slim release tool: Many Daylight blind brackets have a front or rear locking tab that can be eased open with a small flathead screwdriver or a slim trim removal tool. This is especially useful when the bracket is stiff from age, dust, or paint.
- A soft cloth or towel: Place one on the sill or floor so the lower bar and fabric do not get scuffed when the Daylight blind comes free.
- A small container for screws and clips: If you are removing the full mounting hardware, keep the bracket screws, covers, and any small stops together so nothing gets lost.
- Replacement brackets or chain parts if needed: If the reason for removal is a damaged mount or worn control side, it can help to look at Daylight blind bracket options, chain connectors, or blind repair kits before taking the blind down.
- A second pair of hands for wider blinds: A wider Daylight blind can flex when you release one side first, so support across the headrail helps prevent bending the tube, crushing the cassette, or creasing the striped fabric.
- Good lighting: Daylight blind brackets can be hard to see because the cassette and front profile often hide the release tabs. A clear view makes it much easier to avoid forcing the wrong section.
Daylight Blind Removal Guide
Before removing a Daylight blind, make sure the fabric is sitting evenly on the roller and the blind is not halfway twisted or bunched to one side. The most common mistake is pulling the blind away from the wall or recess before the bracket lock has been fully released. That can crack the bracket, bend the cassette, or pull the control side loose. Work slowly, support the weight of the blind with one hand, and release one bracket at a time without letting the fabric drop suddenly.
- Position the blind safely before touching the brackets: For most Daylight blinds, it is best to stop the blind in a stable position where the fabric is not heavily tensioned or rolled unevenly. If the fabric is badly skewed, straighten it first so the cassette does not twist during removal.
- Inspect the mounting style: Look closely at whether your Daylight blind is face-fixed, top-fixed, or recess-fitted. Most Daylight blinds use spring-loaded or clip-in brackets that hold the headrail or roller cassette in place. Identify the control side and idle side before trying to release anything.
- Support the blind from underneath: Place one hand under the headrail or cassette. If the blind is wide, have another person support the opposite end. This matters because Daylight blind cassettes can drop quickly once the first bracket lets go.
- Start with the bracket lock or retaining tab: Insert a small flathead screwdriver or plastic pry tool into the bracket tab and gently twist or lift according to the bracket style. On many Daylight blind systems, the front lip or underside clip is what locks the cassette in place.
- Release one side without pulling hard: As soon as one end loosens, do not yank the blind outward. Instead, hold the freed side slightly away from the bracket while keeping the opposite side supported and still seated.
- Free the second side carefully: Move to the other bracket and repeat the same process. Once the second lock releases, lift or angle the cassette out based on how the bracket is shaped. Some Daylight blinds need the front edge tilted down first, while others need a slight sideways movement to clear the pin end.
- Lower the blind onto a protected surface: Set the blind down on a towel, table, or clean floor area. Avoid resting the striped fabric on dirty surfaces because the sheer bands can mark more easily than thicker blind materials.
- Check the brackets before removing screws: If you are only servicing the blind itself, you may not need to remove the mounting brackets from the wall or recess. If you are replacing the whole blind, use a precision screwdriver set or compact drill driver to remove the screws cleanly.
- Keep the chain side protected: If your Daylight blind uses a sidewinder chain, avoid letting the control mechanism hang awkwardly or hit the floor. The chain clutch and drive side are often the parts most likely to crack when the blind is handled roughly.
- Label the blind if you plan to reinstall it: If you are taking down more than one Daylight blind, mark which room or window it came from and keep each blind with its original brackets. This saves time later and reduces the chance of mixing similar-looking hardware.

Vercraft 2 Pcs Vertical Blind Wand Control Replacement Repair Accessories White Window Blinds Replacement Parts

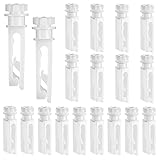
60 PCS Vertical Blind Repair Tabs Kit Clear Fixer Verticle Blinds Snap in Replacement Slats Parts Panels
Vertical Blind Replacement Parts Repair Tabs White Stems for Window Carrier Vertical Blinds Curtain Accessories(12 Pieces)
Common Problems When Taking Down Daylight Blind
- The blind will not release from the bracket: This usually means the retaining tab has not been fully opened or the installer painted around the bracket. A plastic pry tool can help ease the clip without marking the cassette.
- The cassette starts twisting during removal: This often happens when one side is unsupported. Daylight blinds should be held evenly because the striped fabric and roller can shift if the headrail is hanging from one end.
- The fabric unrolls suddenly: If the blind is handled roughly after removal, the layered Daylight fabric can loosen and misalign. Keep the blind level and avoid putting pressure on the bottom bar.
- The chain mechanism feels loose or cracks: The control side on a Daylight blind can be vulnerable during removal. If the clutch housing is already worn, it may fail as the blind comes free. In that case, compare replacement clutch mechanisms before reinstalling the blind.
- The bracket screws strip in the recess: This is common when old screws were overtightened or fitted into weak plaster. If you are rehanging the blind later, it may help to use fresh wall anchors for blinds or new screws sized to the original brackets.
- The front profile or cassette gets scratched: Metal tools can mark the visible front edge if you lever against the wrong point. Wrap the tool tip or use a non-marring release tool when working on a visible Daylight blind cassette.
- The blind was removed but the fabric bands are now misaligned: This can happen if the blind was picked up by the lower bar or stored on its side. Roll and unroll it gently on a flat surface before reinstalling.
What to Do After Removing Daylight Blind
- Inspect the brackets and clutch side first: Before ordering a whole new blind, check whether the problem is just a broken bracket, damaged end cap, worn chain connector, or faulty sidewinder mechanism.
- Clean the cassette, fabric edge, and mounting area: Dust and grease often build up where Daylight blinds sit inside a recess. Wiping down the cassette and brackets now can make reinstallation smoother later.
- Store the blind flat and dry: If you are not reinstalling it immediately, keep the Daylight blind away from damp areas and do not stack heavy items on top of the fabric or lower bar.
- Replace damaged hardware before rehanging: If the brackets bent during removal or the chain clutch feels rough, compare replacement blind brackets and repair kits so the blind goes back up securely.
- Check the fabric alignment before reinstalling: Daylight blinds work best when the sheer and solid bands track evenly. If the fabric has shifted, correct that before putting the blind back in the brackets.
- Measure the opening again if you plan to replace it: A blind that was difficult to remove may have been over-tight for the recess or mounted with the wrong bracket spacing. Rechecking the width can prevent the same problem with the next blind.
- Decide whether the blind needs repair or full replacement: If the fabric is still good and the issue is mechanical, replacing a few parts is often cheaper than buying a full new Daylight blind.

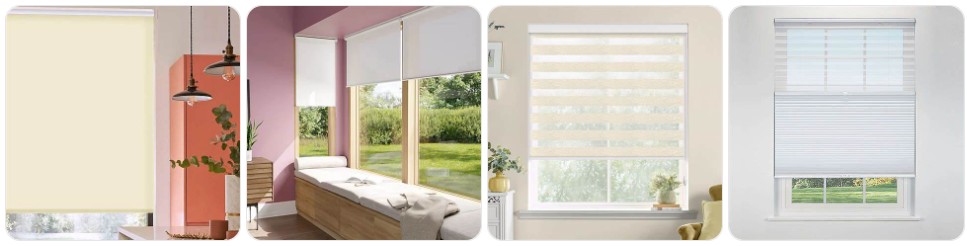
Yellow Daylight Blind
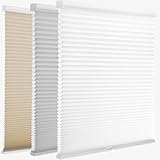
MYshade 1.5-Inch Cellular Cordless Light Filtering Shades, Honeycomb Window Blinds for Soft Daylight & Privacy, Thermal Insulation, Child Safe, Inside or Outside Mount (34" W x 64" H, White)

MYshade Cordless Light Filtering Cellular Shades for Indoor Windows, Honeycomb Window Blinds with Color-Matched Headrail, Easy Lift Shades for Bedroom, Living Room & Office, Beige, 27" W x 72" H
Daylight Blind Removal FAQ
How do you remove a Daylight blind from its brackets?
Most Daylight blinds are removed by supporting the headrail or cassette, locating the retaining tab on the bracket, and gently releasing one side before freeing the other. The exact motion depends on the bracket shape, so do not force the blind outward until the lock is fully released.
Should the blind be fully up or partly down before removing it?
A stable, evenly rolled position is best. The main goal is to avoid removing the blind while the fabric is twisted, skewed, or hanging awkwardly, because that can make the cassette harder to handle safely.
Can I take down a Daylight blind without removing the brackets?
Yes. In many cases, the blind itself can be unclipped from the brackets while the brackets stay mounted in place. This is useful when you only need to clean, inspect, or repair the blind.
What tool is best for releasing a Daylight blind bracket?
A small flathead screwdriver or slim plastic pry tool is usually the best choice because it can reach the bracket tab without putting too much pressure on the visible cassette.
Why will my Daylight blind not come out of the bracket?
The most common reasons are a hidden retaining clip, paint locking the bracket edge, or trying to pull the blind in the wrong direction. Recheck where the bracket tab is located before applying more force.
Can taking down a Daylight blind damage the fabric?
Yes, especially if the blind drops suddenly, twists from one side, or is set down on a dirty or rough surface. The sheer and solid fabric bands should be kept clean, level, and supported during removal.
What usually breaks when removing a Daylight blind?
The parts most likely to fail are the mounting brackets, end caps, and the control-side clutch housing. These parts often wear before the fabric itself does.
Can I reinstall the same Daylight blind after taking it down?
Yes, as long as the brackets, clutch, and fabric alignment are still in good condition. Many Daylight blinds can be removed for cleaning or repair and then reinstalled using the same mounting points.
Summary
Taking down Daylight blinds is mainly about releasing the brackets correctly and supporting the cassette so the striped fabric and control side do not get damaged. If you work slowly, protect the blind once it is off the window, and check the hardware before rehanging it, the process is usually simple. If your next step is fixing a worn bracket, clutch, or chain issue instead of replacing the whole blind, it is worth checking repair Daylight blinds so you can see whether a repair kit or replacement part is the better option.
60 PCS Vertical Blind Repair Tabs Kit Clear Fixer Verticle Blinds Snap in Replacement Slats Parts Panels

#560 Universal Roller Shade Replacement Parts, Roller Blind Fitting Repair Kit for 1.5"(38mm) Tube with R16 Clutches, Metal Bracket, and End Plug
