
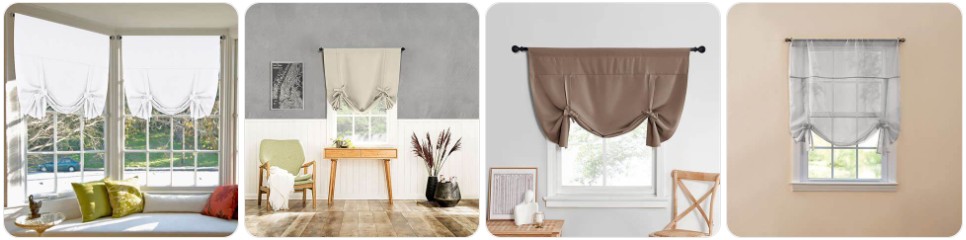
If you need to remove tie-up blinds without tearing the fabric, losing the ties, or damaging the mounting board and rings, the safest approach is to fully untie and lower the blind first, then detach the fabric section before removing the mounting hardware. Tie-up blinds are softer and more fabric-focused than many other blind types, so they need a gentler removal process than roller, vertical, or Venetian blinds. This guide walks through how to take down tie-up blinds step by step while protecting the fabric folds, tie cords, rod pocket or top panel, and the brackets or board that hold everything in place. If you think you may need replacement hardware afterward, it also helps to review Tie-Up blind parts before you begin.
What You Need Before Removing Tie-Up Blind
- A stable step stool or ladder: Tie-up blinds are usually mounted above the window frame, so steady access makes it much easier to undo the blind without pulling on the fabric awkwardly.
- A small screwdriver: Many tie-up blinds are attached with simple screws, support brackets, or a mounting board, so a precision screwdriver set or small household screwdriver is useful for safe removal.
- Needle-nose pliers: A pair of needle-nose pliers can help if a staple, ring clip, or tight fitting needs to be handled carefully during removal.
- A clean flat surface: Once the blind comes down, lay it on a clean surface so the fabric does not pick up dirt, snag, or crease in the folded sections.
- A fabric tie or storage ribbon: This helps keep the blind neatly folded after removal without crushing the gathered fabric or losing the loose ties.
- A container for screws, brackets, and rings: Tie-up blinds often look simple, but it is still easy to lose small mounting screws, decorative caps, or ring hardware once everything is off the wall.
- Optional replacement pieces on hand: If the blind already shows wear, you may want to compare tie-up shade parts, shade rings, replacement shade cord, or blind mounting brackets before you start.
Tie-Up Blind Removal Guide
Tie-up blind removal is easiest when you think of it as a fabric project first and a hardware project second. The main goal is to lower the blind fully, release any tied sections so the folds relax, and then remove the fabric without tugging hard on the ties, rings, or top edge. If you try to take a tie-up blind down while it is still tightly gathered, you can put unnecessary stress on the seams, ring attachments, and mounting points. Work slowly, support the fabric evenly, and keep the ties untangled as the blind comes down.
- Untie the blind completely and lower it flat: Before you touch the hardware, undo the ties so the fabric hangs at its full length. This reduces stress on the stitched folds and makes the blind much easier to handle safely.
- Straighten the fabric and ties: Smooth out the front and back of the blind so the ties, cords, or ribbons are not knotted. Do not pull hard on decorative ties, because they may be sewn into softer fabric than standard blind hardware.
- Check how the blind is mounted: Tie-up blinds may attach to a slim board, a rod pocket, Velcro-style top strip, or small mounting brackets. Identify the exact setup before trying to pull the blind forward.
- Remove any decorative valance or top trim if present: Some tie-up blinds have a decorative top section that covers the mounting board or hardware. Take that off first if it is separate.
- Support the fabric with one hand: Before undoing screws or releasing the blind from the top, hold the fabric gently so it does not drop and stretch the upper edge or pull on the tie sections.
- Release the fabric from the top attachment: If the blind is attached with hook-and-loop material, peel it away slowly and evenly. If it slides off a rod, support the rod pocket and ease it off gently. If it uses screws or brackets, remove those carefully with a small screwdriver.
- Lower the blind evenly: Bring the full blind down in a smooth motion rather than letting one side drop. Tie-up blinds can skew easily if the fabric weight pulls unevenly on one corner.
- Check the rings, ties, and stitched areas as the blind comes down: This is the best time to spot loose rings, frayed cords, or worn stitching along the top section before they get worse.
- Lay the blind flat immediately: Put the blind on a clean surface and smooth the fabric out so the folds do not crease sharply while you deal with the remaining screws or hardware.
- Remove any remaining brackets or board only after the fabric is down: If you are fully uninstalling the setup, remove the remaining mounting board, screws, or support brackets after the fabric section is safely off.
- Bundle the ties neatly for storage: Use a soft ribbon or loose tie to keep the cords or fabric ties together without crushing the blind. This helps prevent tangles and makes reinstallation much easier later.
- Inspect the hardware while everything is accessible: If you notice loose rings, worn cords, or tired mounting pieces, compare shade rings, replacement shade cord, hook-and-loop tape for shades, and mounting brackets.

Blinds & Shades Bungee Tie Down Conversion Kit of Exterior Sun Shades Roller up Blinds,Indoor/Outdoor

6PCS Universal Bungee Kit Parts, Replacement Shade Bungee Kit, Blinds & Shades Bungees Tie Down Conversion Kits for Indoor Outdoor Sun Shades or Roller Up Blind (Black)

Lihopefe Coolaroo Replacement Bungee Kit for Sun Shade Roller Blinds
Common Problems When Taking Down Tie-Up Blind
- The blind is still gathered too tightly: If the fabric is still tied up when you start removal, the upper stitching and tie points can take too much strain. Always lower it fully first.
- The ties get tangled during removal: Tie-up blinds often have loose fabric ties or cords that twist around each other as the blind comes down. Keep them separated as you lower the blind.
- The top edge starts pulling away from the fabric: This can happen if the blind is attached with hook-and-loop material and one side is peeled off too quickly. Remove the top attachment slowly and evenly.
- The rings or sewn points look loose: This is a common thing to notice once the blind is off the window. If so, you may want to compare shade ring replacements or replacement shade cord before reinstalling.
- The mounting board feels stuck: Some tie-up blinds are mounted more like a soft valance on a fixed board. Check for hidden screws or side brackets before trying to pull the board forward.
- The fabric creases while being handled: Tie-up blinds use soft fabric that can crease if dropped over an edge or bundled too tightly. Lay it flat as soon as it comes down.
- One side drops faster than the other: That usually means one top attachment point has already released while the other is still holding. Stop and support the remaining side before continuing.
What to Do After Removing Tie-Up Blind
- Lay the blind flat and smooth the fabric: This helps prevent deep creases and gives you a clear look at any stitching, tie, or ring damage.
- Keep the ties together: Bundle the tie sections loosely so they do not knot during storage. Tangled ties can make reinstalling the blind much more frustrating.
- Inspect the top edge and mounting area: Look for loose stitching, worn hook-and-loop tape, missing rings, or tired brackets. If needed, compare hook-and-loop tape for shades, shade rings, and mounting brackets.
- Clean the blind before storing or rehanging it: It is much easier to dust or spot-clean a tie-up blind while it is already down and laid flat.
- Store the blind in a dry, protected place: Avoid folding it sharply or placing heavy items on top, because the fabric can crease and the tie sections can become misshapen.
- Keep all screws and hardware together: If you plan to reinstall the same blind, storing all mounting pieces in one small bag or container saves time later.
- Decide whether to repair or replace: If removal exposed frayed ties, torn stitching, or badly worn mounting hardware, compare tie-up blinds with the cost of parts and fabric repairs before putting it back up.
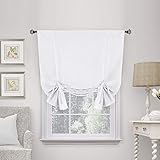
H.VERSAILTEX Pure White Curtain Thermal Insulated Tie Up Window Shade Light Blocking Curtains for Bathroom, Rod Pocket Panel- 42in Wide by 63in Long

Beige Romantic Little Floral Woven Lace Tie Up Balloon Curtain for Kitchen

NICETOWN Thermal Insulated Blackout Short Curtain - Bathroom Curtain Gray Tie Up Shade for Small Window, Window Valance Balloon Roman Blind (Rod Pocket Panel, 46 inches W x 63 inches L)
Tie-Up Blind Removal FAQ
Should I untie a tie-up blind completely before removing it?
Yes. Lowering and untying the blind fully helps relax the fabric and reduces stress on the stitched folds, ties, and top attachment points.
Can I remove a tie-up blind without taking off the mounting board?
Sometimes, yes. If the fabric section detaches from a hook-and-loop strip or slides off a rod, you may be able to remove the blind fabric first and leave the board or supports in place.
Why is my tie-up blind hard to remove from the top?
The most common reasons are hidden screws, a tight hook-and-loop attachment, or a rod pocket that needs to be slid off more evenly. Avoid pulling the fabric sharply from one side only.
Can the fabric ties get damaged during removal?
Yes. Decorative ties and sewn tie sections can fray or stretch if they are used to support the blind’s weight. Always support the blind by the top section and fabric body instead.
Should I wash a tie-up blind after taking it down?
That depends on the fabric and care instructions. Many tie-up blinds can be lightly cleaned while off the window, but delicate or lined fabrics may need gentler care than standard washable curtains.
Can I reinstall the same tie-up blind after removing it?
Yes, as long as the fabric, ties, top edge, and mounting hardware are still in good condition. Removal is also a useful chance to repair small issues before rehanging it.
Is it better to repair a tie-up blind while it is off the window?
Usually, yes. It is much easier to restitch loose rings, replace worn cords, reinforce the top edge, or clean the fabric while the blind is down and fully accessible.
Are tie-up blind parts universal?
Not always. Small items such as rings, cords, hook-and-loop strips, and brackets can vary depending on how the blind was made, so it is best to compare the original hardware before ordering replacements.
Summary
Removing tie-up blinds safely is mostly about lowering the fabric first, releasing the top attachment carefully, and keeping the ties, rings, and mounting pieces organized as the blind comes down. Once the blind is off the window, you can inspect the stitching, clean the fabric, check the top hardware, and decide whether it is ready to reinstall or needs a few repairs first. If your removal project turns into a repair job, it also helps to review repair Tie-Up blinds before putting the blind back up.

60 PCS Vertical Blind Repair Tabs Kit Clear Fixer Verticle Blinds Snap in Replacement Slats Parts Panels

#560 Universal Roller Shade Replacement Parts, Roller Blind Fitting Repair Kit for 1.5"(38mm) Tube with R16 Clutches, Metal Bracket, and End Plug
