
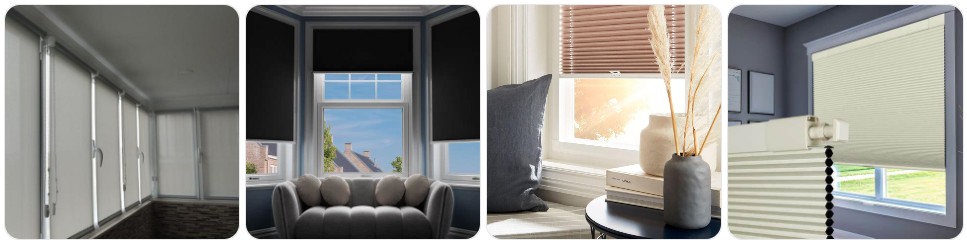
Taking down no-drill blinds is usually easier than removing screw-fixed blinds, but the key is to release the blind from its clip-in, twist-lock, tension-fit, or adhesive-supported brackets without forcing the headrail or bending the mounting tabs. The quick answer is that most no-drill blinds come down by first opening or securing the blind, supporting the headrail with one hand, then unlocking the front clips, tension brackets, or snap-in mounts in the correct order so the blind does not drop unexpectedly. Before you start, it also helps to look at No-Drill blind parts so you know which clips, brackets, adhesive pads, side supports, end caps, and mounting pieces may need checking or replacement once the blind is off the window.
What You Need Before Removing No-Drill Blind
- A stable step stool if the blind is mounted high: Even though no-drill blinds are easier to fit and remove than screw-fixed blinds, you still need both hands free so you can support the headrail while releasing the brackets.
- A second person for wide no-drill blinds: Larger no-drill blinds can shift or twist if one side is released first, especially if the headrail is clipped tightly into top brackets or tension-fit supports.
- A plastic pry tool or trim tool: Many no-drill blinds have clip covers, snap tabs, or tight front catches that are easier to lift with a plastic pry tool rather than a metal screwdriver that could mark the headrail or window frame.
- A small flathead screwdriver for stubborn release tabs: Some no-drill blind systems use slim locking tabs inside the bracket. A small flathead screwdriver can help press the tab gently if the blind does not pop free by hand.
- A microfiber cloth and mild cleaner: No-drill blinds are often mounted with adhesive-backed supports or pressure-fit brackets near finished frames, so it helps to have a microfiber cloth ready to wipe any dust, residue, or marks once the blind is removed.
- A small parts tray or container: Clip covers, end caps, locking tabs, and removable bracket pieces are easy to misplace once the blind comes down. Keep every fitting together right away.
- Painters tape for labeling brackets: Some no-drill blind brackets are side-specific, especially on models that use clip-on adapters or frame-grip mounts. A quick left/right label makes reinstallation much easier.
- Replacement mounting pieces if the blind already feels loose: If the no-drill blind has been slipping, rattling, or sitting crooked, compare no-drill blind brackets, mounting clips, and adhesive mounting supports before removal so you are ready if a part needs replacing.
No-Drill Blind Removal Guide
No-drill blinds are designed to come off more cleanly than blinds secured with screws, but that does not mean they should be pulled down quickly or forced out of the brackets. The safest way to remove one is to identify whether it is clip-mounted, tension-mounted, adhesive-mounted, or twist-locked first, support the headrail properly, and then release the mounting points in the correct order. Avoid yanking the blind by the bottom rail or fabric because that can crack the headrail clips, bend the bracket hooks, or leave the blind hanging awkwardly from one side.
- Inspect the no-drill mounting system carefully: Before touching the blind, look at the top brackets, side supports, and headrail connection points. Some no-drill blinds snap into clip brackets, some sit on frame-grip mounts, some use twist-lock tension fittings, and others attach to adhesive pads or clip-on adapters.
- Move the blind into a safe working position: For roller-style no-drill blinds, raise the blind so the fabric is protected inside or near the tube. For slatted no-drill blinds, lift the blind fully and keep the stack secured. This reduces weight and makes the headrail easier to control.
- Support the headrail with one hand before releasing anything: The biggest mistake with no-drill blinds is unclipping one side and letting the rest of the blind hang from the other bracket. Always support the full blind before pressing any release tab.
- Remove any front covers or trim caps first: If your no-drill blind has decorative caps over the brackets, lift them gently with a plastic pry tool. Do not force them off aggressively because many no-drill blind covers are thin and can crack around the clips.
- Release the front clip or locking tab: Many no-drill blind brackets hold the headrail under a front lip or spring tab. Use your fingers or a small flathead screwdriver to press the release point while gently rolling or tilting the headrail forward.
- Free one side slightly, but do not let it drop: Once the first bracket loosens, keep the blind supported and move immediately to the second bracket. No-drill blinds can bend if the headrail hangs unevenly from one clip.
- Release the remaining brackets in sequence: If the blind has two brackets, free the second side while keeping the blind level. If it has center support clips, release the outer brackets first only if the blind design allows it, then lower the headrail evenly from the center support.
- For tension-fit no-drill blinds, reduce pressure carefully: Some systems grip the window recess by compression rather than clips. In that case, loosen the tension or rotate the locking ends gradually rather than pulling the blind straight out.
- For adhesive-mounted no-drill blinds, separate the blind from the mounting plate first: If the blind clips onto an adhesive-backed base, remove the headrail from the base before trying to peel anything off the frame. If adhesive residue remains, it is usually safer to soften and clean it later rather than scraping it immediately.
- Lower the blind in one controlled movement: Once all supports are free, bring the no-drill blind down evenly and place it on a soft surface. This helps protect the headrail, bottom bar, slats, fabric, and bracket edges.
- Inspect the mounting hardware after removal: Check for cracked clips, loose adapters, worn adhesive pads, bent hooks, or damaged end caps. If needed, compare no-drill blind replacement parts and repair kits for no-drill blinds before reinstalling.
- Keep all parts together for reinstallation: Store the blind flat and place every clip cover, bracket insert, locking tab, and adapter into a container so the full no-drill mounting set stays together.
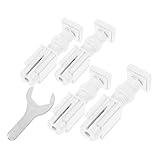
Angoily 4pcs Mini Blind Replacement Parts: No Drill Blind Brackets 1 Inch - Window Curtain Clips Brackets with Wrench for Home Horizontal Curtain
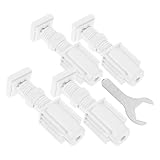
NUOBESTY No Drill Blind Brackets Louver Blind Mounting Brackets Clips Window Shade Replacement Parts Universal Fit 4pcs 1 Inch

IMIKEYA 4pcs Louver Blind Brackets No Drill Mounting Brackets for Windows Universal Fit Easy Installation
Common Problems When Taking Down No-Drill Blind
- The headrail will not unclip from the brackets: This usually means a front catch, hidden locking tab, or center support is still engaged. No-drill blinds often need the headrail to tilt forward slightly before it can lift free.
- One side comes loose but the other side stays stuck: This is very common with no-drill blinds that use spring clips. Keep the headrail supported and release the second side gently rather than twisting the blind sideways.
- The bracket feels like it might snap: No-drill bracket plastics can get brittle over time, especially in sunny windows. Press the release tab carefully and use a plastic tool where possible instead of prying hard with metal.
- The blind was installed onto adhesive pads and the base plate stays behind: That is normal on some systems. Remove the blind body first, then deal with the mounting pad and adhesive residue separately.
- Tension-fit mounts feel jammed in the recess: This usually means the blind is still under pressure. Loosen the end mechanism or reverse the locking motion before trying to pull the blind down.
- The headrail bends slightly during removal: This can happen when a wide no-drill blind hangs from one side too long. Supporting the blind across its full width is the best way to avoid permanent distortion.
- Clip covers or end caps go missing: Small no-drill blind trim pieces are easy to lose because they often pop free once the headrail is released. A parts tray helps a lot during removal.
- The blind was already slipping before removal: That often points to worn clips, weak adhesive, or deformed no-drill brackets. It is worth comparing replacement mounting clips before putting the same hardware back up.
What to Do After Removing No-Drill Blind
- Lay the blind flat on a clean surface: No-drill blinds can be knocked out of alignment once removed, especially if the headrail, slats, or roller tube are left leaning against a wall.
- Inspect the window frame or recess carefully: Check whether the no-drill mount left marks, pressure spots, adhesive residue, or signs that the blind was fitted slightly off level.
- Clean the frame before reinstalling anything: Dust, grease, and residue can stop no-drill mounts from gripping properly the next time. A soft cleaning cloth and mild cleaner are usually enough.
- Check the brackets, clip inserts, and locking tabs for wear: If any piece looks cracked, loose, or warped, replace it before refitting the blind. No-drill systems rely heavily on those small fittings staying tight.
- Remove adhesive residue slowly if present: If your no-drill blind used adhesive mounting pads, clean the leftover residue carefully rather than scraping the frame aggressively. If needed, compare adhesive removers for window frames that are suitable for finished surfaces.
- Decide whether the blind needs repair before it goes back up: If the blind was crooked, loose, or hard to operate before removal, this is the best time to replace worn supports, adapters, or clips instead of reinstalling the same tired hardware.
- Keep left and right fittings separated: Many no-drill blind systems look symmetrical at first, but side clips or adapter pieces can still be handed and should be kept in order.
- Store the blind where the headrail will stay straight: This matters especially for wider no-drill blinds and lightweight headrails that can warp if stored badly.
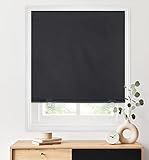
LazBlinds 100% Blackout Roller Shades, 36"x72", Black

Window Blinds Cordless No Drill Cut to Size Clip On Stick On Self Adhesive Temporary Blinds Pleated Paper Blinds for Windows Doors Shades for Home Nursery Bedroom Kitchen Bathroom
No-Drill Blind Removal FAQ
How do you remove no-drill blinds without damaging them?
The safest method is to support the headrail first, identify the exact clip or tension system being used, and release the brackets in the correct order instead of pulling the blind down by force.
Do all no-drill blinds come down the same way?
No. Some no-drill blinds are clip-mounted, some are tension-fit, some twist-lock into place, and some use adhesive-backed mounting bases. The release method depends on the bracket style.
Should I raise the no-drill blind before taking it down?
Yes, in most cases. Raising the blind reduces weight on the headrail and helps protect the slats or fabric while you release the mounting clips.
Why is my no-drill blind stuck after I release one side?
That usually means the other clip, center support, or locking tab is still engaged. Keep the blind supported and check for a front catch or hidden release point instead of twisting the headrail.
Can I remove no-drill blinds by myself?
Yes, smaller no-drill blinds are often manageable alone, but wider blinds are much easier to remove safely with a second person supporting the opposite side.
What tools are best for taking down no-drill blinds?
A plastic pry tool, a small flathead screwdriver, a step stool, a microfiber cloth, and a small parts container are the most useful items for most no-drill blind removal jobs.
Will removing no-drill blinds damage the window frame?
Usually not if the blind is unclipped correctly. The main risk comes from forcing the brackets, scraping adhesive carelessly, or using metal tools too aggressively against painted or finished frames.
What should I inspect after removing a no-drill blind?
Check the brackets, locking tabs, adhesive pads, adapter pieces, end caps, headrail, and the frame contact points. Those are the areas most likely to show wear or cause reinstallation problems.
Summary
Removing no-drill blinds is mainly about understanding the mounting system, supporting the headrail properly, and releasing each clip, tab, or tension fitting in a controlled order so the blind does not twist or drop. Because no-drill blinds rely on brackets, snap-in mounts, frame-grip supports, or adhesive-backed fittings rather than screws, they should be taken down carefully rather than pulled straight off the window. After removal, inspect the clips, headrail, adapters, and frame contact points, clean away any dust or residue, and replace worn hardware before reinstalling. If the blind was loose, crooked, or no longer staying secure, it may also help to see how to repair No-Drill blinds before deciding whether to reuse the same setup.

