
Pleated Blind replacement parts are often enough to restore a sagging, uneven, or hard-to-operate shade without replacing the full window covering. In many cases, worn cords, damaged handle tabs, broken brackets, tired tension shoes, or missing end caps are the real cause of poor performance. This guide explains which pleated blind parts usually fail, how to identify the right match, when repair makes sense, and where to shop for parts such as pleated blind replacement parts, replacement lift cord, and repair kits online.
Buy Pleated Blind Parts Online
Replacement brackets secure the headrail correctly and solve common issues like a blind that tilts forward, rattles, or falls out of the window recess. Match the bracket shape, clip style, and fixing orientation carefully before buying. » find on amazon / find on ebay
Frayed or stretched lift cord is one of the most common pleated blind failures, especially on blinds that rise unevenly or drop on one side. Choose the correct diameter and low-stretch cord suitable for pleated or cellular-style fabric shades. » find on amazon / find on ebay
A worn cord lock can cause the blind to slip down instead of staying at the chosen height. This part grips and releases the cords inside the headrail, so you need the right lock style for your rail width and cord count. » find on amazon / find on ebay
Handle tabs or finger grips are especially important on cordless pleated blinds, roof blinds, and tensioned blinds where you move the rail by hand. Replacing cracked tabs helps prevent fabric tugging, rail twisting, and damage to the pleat edges. » find on amazon / find on ebay
End caps finish the headrail or bottom rail and help keep internal components aligned. If one is broken or missing, the rail can shift, scrape, or loosen at the ends, making the blind look untidy and operate less smoothly. » find on amazon / find on ebay
Tension hardware is common on conservatory, skylight, and perfect-fit style pleated blinds where the fabric must stay guided close to the glass. Worn shoes or guides can cause slack support wires, poor tracking, and bunching near the rail edges. » find on amazon / find on ebay
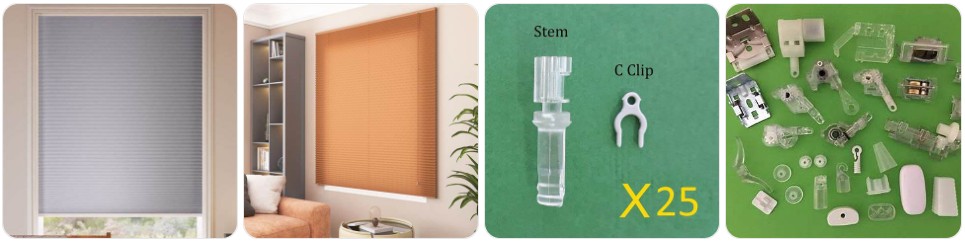
Some pleated systems use separate fixing clips instead of full box brackets. These small parts matter because the wrong clip depth or locking lip can leave the rail loose or impossible to snap securely into place after maintenance. » find on amazon / find on ebay
A repair kit is the easiest option when you are not yet sure which small consumable part failed. Good kits often include cord, restring tools, cord stops, handles, and assorted hardware for common pleated shade fixes and minor maintenance jobs. » find on amazon / find on ebay
Signs You Need Replacement Parts for Your Pleated Blind
- The pleats stack unevenly at the top or bottom: When a pleated blind starts gathering more heavily on one side, the problem is often a stretched lift cord, a slipping internal lock, or a guide issue rather than damaged fabric alone.
- The blind will not stay at the height you set: If the shade slowly creeps down after you raise it, the cord lock is usually worn or the cords are no longer sitting correctly in the locking channel inside the headrail.
- One side lifts faster than the other: Pleated blinds rely on balanced cord routing. When one side rises first, check for frayed cord, a partly seized guide, or a bottom rail that has shifted because of missing end caps or rail hardware.
- The bottom rail feels awkward to grip: Cordless pleated blinds often get pulled by the fabric once a handle tab breaks. Replacing the handle tab early helps protect the pleat folds from distortion and fingertip dirt marks.
- The blind has become loose against the glass: This is especially common on tensioned pleated systems fitted to doors, conservatories, and roof windows. A failed shoe, guide, or tension wire anchor can let the blind bow outward instead of tracking neatly.
- The headrail no longer clips in firmly: If the rail feels unstable after cleaning or decorating, the issue may be cracked mounting brackets or worn fixing clips rather than the blind itself. Do not force the rail back in if the clip profile looks damaged.
- The rail ends scrape or look unfinished: Missing end caps can allow the rail to shift sideways, expose metal edges, and slightly alter cord alignment. That small part can have a surprisingly big effect on how neatly the pleated blind opens and closes.
- You can see fraying near the cord holes in the fabric: Once cords start roughening or dragging, the blind becomes harder to raise smoothly. Replacing the cord sooner is often cheaper than waiting until the shade becomes fully non-operational.

3/4" LiteRise Cordless Shades Handles for Hunter Douglas Replacement Parts

RV Pleated Shade Hold Down Blind Tensioner - Clear (4)

GYPNS RV Pleated Shade Repair Kit Shade Cord Retainer Bushings and Springs
How to Identify the Right Pleated Blind Replacement Part
- Start with the operating style first: Before buying anything, confirm whether you have a corded, cordless, top-down bottom-up, or tensioned pleated blind. A handle tab for a cordless blind, for example, will not solve a slipping issue caused by a worn cord lock in a standard corded model.
- Measure the headrail and bottom rail carefully: Pleated blind hardware is often selected by rail width, rail depth, and clip shape. Even parts that look nearly identical online can fail to fit if the rail profile is a few millimetres different.
- Check how many lift cords the blind uses: Narrow pleated blinds may use fewer cord runs than wide shades, while top-down bottom-up models usually have more complex routing. The cord count matters when matching locks, guides, and restring kits.
- Look at where the failure happens: If the issue is in the headrail, you are usually dealing with brackets, locks, clips, or internal hardware. If it is at the bottom rail or moving rail, check end caps, handles, guide parts, and cord anchoring points first.
- Match the blind to the window application: Pleated blinds fitted to roof windows, glazed doors, conservatories, and perfect-fit frames often use tension shoes, side guides, and specialist brackets that are different from a simple free-hanging recess blind.
- Compare the damaged part’s fixing method: Some parts slide into the rail, some clip in, and others are pinned or screwed. When shopping for mounting brackets or clips, always match not just the shape but also the way the part locks into place.
- Use a repair kit when you cannot identify one tiny consumable: If the blind has multiple small issues such as tired cord, missing stops, and worn tabs, a pleated blind repair kit can be the most practical first purchase while you confirm the exact hardware needed.
- Focus on pleated-shade wording in listings: Search terms such as pleated blind, pleated shade, cellular/pleated hardware, and top-down bottom-up pleated parts usually produce better matches than generic blind hardware searches, which often return mini blind or roller blind components instead.
Should You Repair or Replace the Whole Pleated Blind?
Repairing a pleated blind usually makes the most sense when the fabric is still in good condition and the problem is isolated to hardware such as a cord lock, bracket, handle tab, guide, or a broken length of replacement cord. Because pleated fabric can still look excellent long after small components wear out, a targeted repair is often the cheaper and faster option, especially for custom-fit blinds in conservatories, doors, and shaped window recesses.
Replacing the whole blind becomes the better option when the pleats are badly crushed, the fabric has yellowed or split at several cord holes, or multiple parts have failed after years of UV exposure. If you would need a new lock, new cords, fresh brackets, and rail work all at once, it may be more sensible to compare the cost of repair against a full new pleated blind. In short, repair the hardware when the fabric still deserves saving; replace the blind when the material itself has become the weak point.

Window Blinds Cordless No Drill Cut to Size Clip On Stick On Self Adhesive Temporary Blinds Pleated Paper Blinds for Windows Doors Shades for Home Nursery Bedroom Kitchen Bathroom

Window Blinds Cordless No Drill Cut to Size Stick On Temporary Paper Shades

BlindsAvenue Cordless Cellular Honeycomb Shade, Light Filtering Blinds for Indoor Window, Thermal Insulation Shades for Home, Noise Reduction, Color: White, Size: 35" W x 48" H
How to Prevent Parts Damage to Pleated Blind
- Lift and lower the blind evenly: On corded pleated blinds, jerking one cord faster than the others can throw the bottom rail out of level and increase strain on the cord lock and internal routing. Smooth movement helps the pleats stack more cleanly.
- Use the handle tab, not the fabric: On cordless or moving-rail pleated blinds, pulling directly on the cloth weakens the pleat edges and transfers dirt and skin oils onto the fabric. A simple replacement handle tab is far better than gripping the blind material.
- Keep tensioned systems properly aligned: Pleated blinds on doors, skylights, and conservatories should travel along their guides without twisting. If you notice the rail leaning or the wires loosening, address it early before the tension shoes and guide parts wear out completely.
- Do not force the blind past resistance: When a pleated blind suddenly feels tight or catches near the top, stop and inspect the hardware. Forcing it can snap a cord, crack a clip, or distort the rail much faster than the original fault would have done.
- Dust around the cord paths and rails: Fine dust buildup inside the headrail and around guide holes can add friction over time. Gentle maintenance helps cords last longer and reduces wear on moving hardware, especially on frequently used bedroom and kitchen pleated blinds.
- Protect the blind from heat concentration: Pleated blinds fitted very close to hot glass, heaters, or roof windows can suffer faster plastic fatigue in tabs, clips, and end caps. Consistent overheating dries out small parts and can make them brittle.
- Refit removed brackets carefully after decorating: Pleated blind brackets often look simple, but slight misalignment can leave the rail under constant stress. When reinstalling, make sure the rail clips in squarely rather than forcing one side into place first.
- Keep a small repair kit on hand: Having spare cord, a few clips, and basic hardware ready makes it easier to fix minor wear before it turns into a full failure. A compact repair kit is especially useful for older custom pleated shades.
Pleated Blind Parts FAQ
What are the most commonly replaced pleated blind parts?
The parts most often replaced are lift cord, cord locks, mounting brackets, handle tabs, end caps, guide parts, and small fixing clips. On conservatory or door-mounted pleated blinds, tension hardware also wears out more often than many homeowners expect.
Can I repair a pleated blind if it only drops on one side?
Yes, that symptom is often repairable. In many cases it points to frayed cord, uneven cord routing, a loose bottom rail anchor, or a worn guide component rather than failed fabric. A replacement cord or small hardware part may solve it.
Are pleated blind parts universal?
No, many are not universal. Rail size, operating style, cord count, bracket profile, and window application all matter. Pleated blind parts can look similar across brands while still having slightly different measurements that affect fit.
Is a repair kit worth buying for pleated blinds?
A repair kit is worth it when you have minor wear, missing consumables, or an older blind with several small issues. It is also useful when the exact failed component is not obvious yet. Browse pleated blind repair kits to compare what is included.
When should I replace the whole pleated blind instead of the parts?
If the fabric is badly faded, crushed, torn around multiple cord holes, or no longer sits neatly even after hardware replacement, the better long-term choice may be a complete new blind. Hardware repairs make most sense when the pleated fabric is still structurally sound.
What should I measure before ordering pleated blind brackets or clips?
Measure the headrail width and depth, compare the clip or bracket profile, and check whether the part screws in, slides in, or snap-fits. Taking a photo of the removed part beside a tape measure can make it much easier to match online listings.

60 PCS Vertical Blind Repair Tabs Kit Clear Fixer Verticle Blinds Snap in Replacement Slats Parts Panels

#560 Universal Roller Shade Replacement Parts, Roller Blind Fitting Repair Kit for 1.5"(38mm) Tube with R16 Clutches, Metal Bracket, and End Plug
