
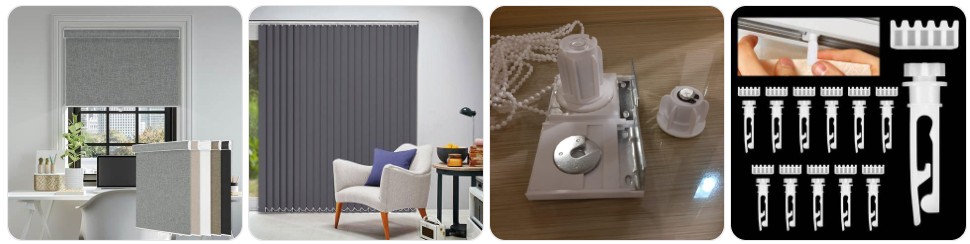
Blackout Blind replacement parts are often enough to fix a blind that rolls unevenly, leaks light around the hem, slips on the tube, or no longer moves smoothly. In many cases you do not need to replace the full blind at all. The most common fixes involve a worn chain clutch, damaged brackets, missing end cap, loose bottom bar insert, tired spring, or a small hardware set that restores proper tension and alignment.
Buy Blackout Blind Parts Online
A replacement clutch helps when your blackout blind chain skips, jams, slips, or stops raising the fabric evenly. It is one of the most important control-side parts on roller-style blackout blinds and is widely available in multiple tube sizes. » find on amazon / find on ebay
Brackets hold the blackout roller securely at both ends. Bent, cracked, or loose brackets can make the blind sag, scrape, or pop out during use, especially on wider bedroom blackout blinds with heavier room-darkening fabric. » find on amazon / find on ebay
If the operating loop has snapped, stretched, or separated at the connector, a new beaded chain can restore smooth lifting and lowering. Matching the bead size and loop length matters for blackout blinds mounted high above bedroom windows. » find on amazon / find on ebay
The idle end supports the opposite side of the roller tube and keeps the blackout fabric tracking correctly. When it wears or slips, the blind can lean, telescope, or unroll unevenly, creating visible side light gaps. » find on amazon / find on ebay
Tube inserts fit inside the roller tube so the clutch or idle end seats properly. On blackout blinds, a worn insert can cause wobble, poor alignment, and a rolling action that feels rough or increasingly noisy over time. » find on amazon / find on ebay
A replacement bottom bar helps when the hem rail is bent, missing end caps, or no longer keeps the blackout fabric straight. This part is especially useful when the blind curls at the bottom and leaves light leaking in. » find on amazon / find on ebay
Some blackout blinds rely on side channels to reduce edge glow and improve room darkening. If those guides crack, bow, or detach, you lose one of the key performance features that makes blackout blinds different from standard rollers. » find on amazon / find on ebay
Spring-loaded blackout blinds need the correct tension component to retract smoothly and stop at the right position. When the spring weakens, the blind may snap back too fast, drift downward, or refuse to stay fully raised. » find on amazon / find on ebay
A repair kit is the best starting point when you are not sure which small hardware piece failed. Many kits bundle brackets, chain connectors, clutch parts, pins, and mounting screws that solve the most common blackout blind operating problems. » find on amazon / find on ebay
Signs You Need Replacement Parts for Your Blackout Blind
- The blind rolls up crooked and starts telescoping to one side: On a blackout blind, this usually points to a worn idle end or end plug rather than a fabric problem. Once the tube sits off-center, the heavier blackout material can drift sideways and leave larger edge gaps.
- More light is leaking around the edges than before: If the fabric itself is still intact but your room is no longer getting properly dark, the issue may be a failing bottom bar, loose side channels, or a roller that is no longer tracking straight. Blackout performance depends on alignment, not just fabric opacity.
- The chain slips without moving the blind properly: This is a classic sign that the clutch is worn or cracked. A tired clutch cannot grip the tube consistently, so the blackout blind may drop in jerks, stall mid-travel, or feel rough when you pull the chain loop.
- The bottom hem bar bows, twists, or no longer hangs flat: Blackout blinds use a weighted lower section to help seal the fabric and keep it vertical. When that piece bends or loses its end caps, the blind can curl up at the edges and let in early morning light.
- The blind pops out of its bracket during normal use: Wider blackout blinds are heavier than basic light-filtering rollers. If the bracket tabs wear down or loosen from the wall, the extra fabric weight can make the roller lift out unexpectedly during raising or lowering.
- Your spring blackout blind snaps upward too fast or will not stay where you leave it: That usually means the internal spring tension system is worn, mis-set, or failing. Replacing the spring mechanism is often more practical than replacing an otherwise good blackout shade.
- The blind has started making clicking or grinding sounds: Noise from a blackout roller often comes from the control side where the clutch, tube insert, or bracket is wearing. A new clutch assembly or support part can restore smoother, quieter motion.
- The side guides no longer keep the room dark: On cassette or guided blackout systems, detached channels let light bleed back in around the edges. If complete darkness matters for sleep, nurseries, or media rooms, replacing those guide pieces can make a visible difference immediately.

Roller Shade Clutch Repair Kit for 38 mm/1.5" Tube, Replacement Parts Set with Metal Brackets, Plastic Bead Chain and End Caps, Fits Roller Window Shades and Blackout Blinds, Easy Install

KOCOZA 38mm Roller Shade Clutch Replacement Kit 1.5 Inch Metal Plastic Bracket End Plug Universal Blind Repair Accessories for Zebra Blinds Blackout Solar Shades Day Night Blinds DIY Easy Install
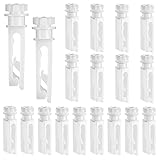
Vertical Blind Replacement Parts Repair Tabs White Stems for Window Carrier Vertical Blinds Curtain Accessories(12 Pieces)
How to Identify the Right Blackout Blind Replacement Part
- Check whether your blackout blind is chain-operated or spring-loaded first: This is the fastest way to narrow down the right hardware. A chain-operated blackout blind usually needs a clutch, chain loop, bracket, or idle end, while a spring blackout blind usually points you toward a spring core or tension-related part.
- Measure the roller tube diameter before you buy anything: Blackout blind clutches, inserts, and pin ends are often sized around the metal or aluminum tube. If you order a part for the wrong tube diameter, it may look close but still fit loosely, bind during use, or fail under the heavier load of blackout fabric.
- Look closely at the control side, not just the fabric: If the blind will not raise smoothly, remove it and inspect the clutch teeth, chain wheel, and bracket seat. Many homeowners assume the blackout material is the issue when the real fault is a small control-side component like a roller blind clutch.
- Check whether your blackout system uses a cassette, fascia, or side channels: Bedroom blackout blinds often include extra light-blocking hardware that standard rollers do not use. If your room-darkening performance has worsened, do not just search for “blind parts”; identify whether you also need cassette clips, fascia brackets, or side-channel pieces.
- Inspect the bottom bar and hem pocket width: If the blind hangs unevenly or the bottom edge curls, measure the hem bar length and profile carefully. A replacement bottom bar for a blackout blind needs to match the fabric pocket and weight well enough to keep the material straight and reduce edge glow.
- Compare bracket shape and mounting style: Some blackout blinds mount inside the recess, some outside, and some clip into dedicated hardware. Matching the bracket hole pattern, tab design, and projection depth matters because blackout blinds often sit tighter to the window to reduce light bleed.
- Use repair kits when multiple small parts are missing: If you inherited the blind, lost hardware during removal, or have mismatched old components, a blackout blind repair kit can be a smarter buy than guessing one piece at a time.
- Check for brand-specific fittings if the blind came from a major retailer: Many blackout blinds look generic from the front but use proprietary bracket tabs, cassette clips, or chain clutches. Matching by photo, dimensions, and mounting details is usually more reliable than buying by appearance alone.
Should You Repair or Replace the Whole Blackout Blind?
In many cases, you should repair the blind if the blackout fabric is still in good condition and the problem is limited to the control mechanism, brackets, side guides, bottom bar, or a small internal fitting. Blackout blinds are often replaced too early when the actual issue is just a worn clutch, a broken chain connector, or a loose idle end. If the shade still blocks light well and matches the room, swapping in a correctly sized replacement part is usually the better value.
You should think more seriously about replacing the whole blackout blind when the fabric backing is cracking, the room-darkening coating is peeling, the material has warped from heat, or the blind leaks light because the panel itself no longer hangs square. If several parts have failed at once and the blackout system is a low-cost ready-made unit with hard-to-match fittings, moving to a completely new blackout blind can be more practical than piecing together multiple repairs.
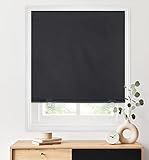
LazBlinds 100% Blackout Roller Shades, 36"x72", Black

Petaholic 100% Blackout Curtains for Bedroom, Portable DIY Window Blinds, No Drill Window Shades & Blackout Blinds with Stickers & Tabs for Travel, Dorm Room, Media Room (118" x 57")

Window Blinds Cordless Blackout No Drill Cut to Size Clip On Stick On Self Adhesive Temporary Blinds Pleated Paper Blinds for Windows Doors Shades for Home Nursery Bedroom Kitchen Bathroom
How to Prevent Parts Damage to Blackout Blind
- Keep the blind rolling straight every time: If a blackout blind starts drifting to one side, stop using force and correct the alignment early. Repeated crooked rolling puts extra strain on the clutch, idle end, and brackets, and it also increases the chance of side light gaps getting worse over time.
- Do not yank the chain to overcome resistance: Blackout fabric is usually heavier than sheer or light-filtering material, so rough pulling accelerates wear on the control mechanism. If the chain feels tight, check the clutch and brackets first instead of forcing it and risking a full clutch failure.
- Support wide blackout blinds during removal and reinstallation: Larger bedroom blackout blinds can twist under their own weight when one side is released first. Holding both ends evenly helps protect the brackets, tube inserts, and fascia clips from cracking or warping.
- Clean dust from side channels and cassette edges: Guided blackout blinds rely on snug side clearance to reduce edge glow. Dust buildup can increase drag, wear the channel surfaces, and make the blind feel harder to move, especially in rooms where windows stay shut for long periods.
- Do not leave the bottom bar resting against furniture or deep sills: When the hem bar hits an obstacle before the blind is fully lowered, the roller can keep turning slightly and put stress into the fabric edge, bottom bar inserts, and control side. A clear drop path matters on blackout blinds.
- Reduce heat stress where possible: Strong sun and trapped window heat can shorten the life of blackout coatings, adhesives, and some plastic fittings. If the blind sits in an especially hot opening, inspect the clutch housing, side guides, and end plugs more often for early signs of brittleness.
- Replace tiny damaged pieces early: A cheap chain connector, cracked bracket cover, or loose end plug can quickly lead to bigger blackout-blind problems if ignored. Keeping a small repair kit on hand makes quick preventative fixes much easier.
- Make sure the blind is mounted level after any adjustment: Even a slight bracket tilt can matter on a blackout blind because the fabric needs to hang square to preserve room darkening. Rechecking level after tightening screws helps protect the operating parts and the blackout performance at the same time.
Blackout Blind Parts FAQ
What is the most common replacement part on a blackout blind?
The most common replacement part is usually the chain clutch because it handles the repeated lifting and lowering load. On many roller-style blackout blinds, the clutch wears before the fabric does, especially when the blind is used every morning and night.
Can I replace blackout blind parts without replacing the fabric?
Yes, very often you can. If the blackout fabric is still straight, clean, and effective at blocking light, replacing the clutch, beaded chain, brackets, idle end, or bottom bar is usually enough to restore normal operation.
Why does my blackout blind let in more light even though the fabric still looks fine?
That often happens when the roller is no longer tracking straight, the bottom bar has bent, or the side channels have loosened. Blackout performance depends on correct positioning and edge coverage, not only on the opacity of the material itself.
Are blackout blind parts the same as standard roller blind parts?
Sometimes, but not always. Many blackout blinds use roller-style hardware, yet the heavier fabric and tighter light-control design can mean different bracket projections, stronger clutches, cassette fittings, or side-guide parts that standard light-filtering blinds do not use.
How do I know which clutch size to buy for my blackout blind?
Measure the roller tube diameter and compare the shape of the insert and bracket seat. The right clutch must match the tube size and fit securely because blackout blinds usually place more load on the control side than lighter shades do.
Is it worth buying a blackout blind repair kit?
Yes, especially if you are missing multiple small pieces or you are not certain which hardware failed. A repair kit can save time and usually costs less than ordering several trial parts one by one.
Can side channels really make a difference on blackout blinds?
Yes. Side channels help reduce the edge light that often remains even with high-quality blackout fabric. If those guides are damaged or missing, the room may feel much brighter around sunrise or streetlight exposure even though the central fabric area still blocks light well.
When should I replace the whole blackout blind instead of just the parts?
You should lean toward full replacement when the blackout coating is peeling, the fabric backing is cracking, the material has permanently warped, or several parts have failed on a low-cost blind with hard-to-match fittings. In that situation, a new complete blackout blind may be the simpler long-term fix.

