
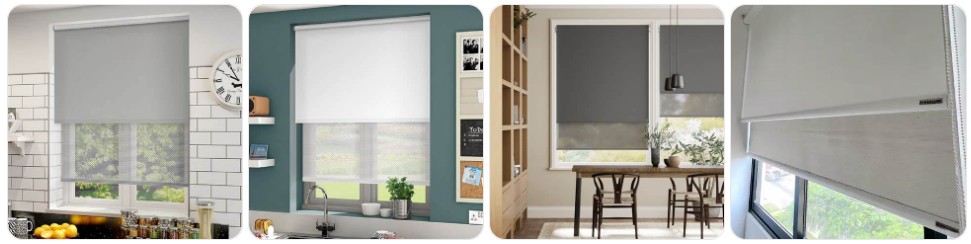
If you need to remove double roller blinds without damaging the paired tubes, layered fabrics, side controls, or shared mounting brackets, the safest approach is to lower both blinds into a relaxed position, support the bracketed system evenly, and remove one roller at a time without twisting the hardware. Double roller blinds are more delicate to take down than a standard single roller because they use two shades in one installation, often with a day screen and a blackout layer sitting on a compact dual-bracket setup. This guide explains how to take down double roller blinds step by step while protecting both fabric rolls, the control sides, the idle ends, and the mounting system. If you think you may need hardware afterward, it also helps to review Double Roller blind parts before you begin.
What You Need Before Removing Double Roller Blind
- A stable step stool or ladder: Double roller blinds can be bulkier than a single roller blind, so you need secure overhead access before you try to release either tube from the brackets.
- A small screwdriver: Many double roller systems use tight retaining tabs, spring clips, or cassette covers that are easier to release with a precision screwdriver set.
- Needle-nose pliers: A pair of needle-nose pliers can help if an end pin is stiff or if one of the bracket tabs is difficult to reach cleanly.
- A clean flat surface: Once each blind is down, lay the rollers somewhere clean so the fabrics do not pick up dirt, edge damage, or pressure creases.
- Two soft ties or straps: Because you are dealing with two separate fabric rolls, it helps to secure each one loosely after removal. Do not tie them too tightly, especially if one layer is a blackout fabric that marks easily.
- A small container for screws and bracket covers: Keep all bracket caps, cassette covers, and mounting screws together so reinstallation is easier later.
- Optional replacement parts on hand: If the blinds already feel worn, it may help to compare double roller blind parts, roller shade clutch replacements, or roller shade mounting brackets before you start.
Double Roller Blind Removal Guide
Double roller blind removal is safest when you treat the system as two separate rollers sharing one installation, rather than trying to pull the whole assembly down in one motion. In most setups, one roller sits slightly forward of the other, and both need to be supported carefully so the brackets, clutch ends, and fabric wraps stay aligned. The easiest method is to remove the front or more accessible blind first, then take down the second blind once the bracket area is easier to reach. If the system has a cassette or shared fascia, take that off first and work slowly so neither fabric layer unwinds or rubs against the other during removal.
- Lower both blinds into a relaxed position: Bring each roller down enough that the fabrics are not under tight tension. This reduces stress on the clutch sides and makes the tubes easier to handle safely.
- Inspect the bracket layout first: Look closely at both ends so you understand how the front and rear roller are seated. Double roller blinds often use stacked or offset brackets, so it is important to know which roller should come out first.
- Remove any cassette, fascia, or bracket cover: If your system has a front cover, unclip or remove it first so you can see the bracket tabs and end fittings clearly.
- Support the front roller tube with one hand: Before releasing any bracket clip, hold the more accessible roller by the tube or cassette edge. Do not pull the blind down by the fabric itself, because that can crease the material or shift it on the tube.
- Release the first control side carefully: Use your fingers or a small screwdriver to open the locking tab or press the retaining clip on the clutch side of the first roller.
- Ease the first roller out levelly: Once the clutch side is free, disengage the idle end or spring-loaded pin and remove the first blind in a smooth, level motion.
- Lay the first roller on a clean surface and secure it loosely: This keeps the first fabric layer protected while you work on the second roller still mounted in the brackets.
- Support the second roller before releasing it: With the front blind removed, the rear blind should now be easier to access. Hold it firmly by the tube before opening its bracket clip.
- Release the second roller the same way: Free the clutch side first, then remove the idle end. On some systems, the rear blind may sit tighter in the bracket, so take your time and avoid twisting it out.
- Inspect both rollers and the shared brackets after removal: This is the best time to check the clutches, bead chains, idle ends, and bracket spacing. If anything looks worn, compare double roller blind parts, clutch replacements, and replacement bead chains.
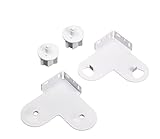
Double Roller Blind Bracket -Roller Blinds Replacement Parts Kit for 1.5"(38mm) Tube, Included 2X End Plug

Universal Replacement Installation Accessories for Indoor/Outdoor Sunshade and Roller Blinds(Crodless Bracket)
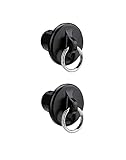
IVYSUN Outdoor Blinds Replacement Parts End Cap with Ring,Double Strength Enhancement,Weather Resistance,Compatible with Coolaroo Exterior Roller Shade(Black,2 Pcs)
Common Problems When Taking Down Double Roller Blind
- It is not obvious which roller should come out first: On many double roller systems, the front roller is easier to remove first because it blocks access to the rear bracket tabs.
- The rear blind feels stuck even after the front blind is removed: This often means the rear clutch side is still seated in a tight retaining clip or the idle-end pin is still under spring tension.
- One fabric roll starts unwinding during removal: Double roller blinds can feel awkward because you are managing two tubes and two fabrics. Keep each roller supported and secure it as soon as it comes free.
- The cassette or fascia will not release cleanly: Some double roller systems hide the brackets behind a shared cover. Take your time here, because forcing the fascia can crack the cover tabs.
- The bracket spacing looks worn or slightly bent: Since double roller blinds carry more combined hardware than a single roller, bracket wear matters more. If needed, compare roller shade mounting brackets before reinstalling the same setup.
- The clutch or chain on one blind looks more worn than the other: This is common on double roller blinds because one layer often gets used more often than the other. Removal is a good time to spot that imbalance and replace parts before reinstalling.
- The two fabrics rub against each other during handling: This can happen if the blinds are taken down too quickly or stacked carelessly afterward. Keep the rollers separate on a clean surface to avoid rubbing or transfer marks.
What to Do After Removing Double Roller Blind
- Lay each roller on a clean, flat surface: Keep the two blinds separated so the fabrics do not rub against each other or pick up dust while they are off the window.
- Label which roller is front and which is rear: This makes reinstallation much easier later, especially if the fabrics serve different purposes such as sunscreen and blackout.
- Check both clutch mechanisms and chains: This is the best time to inspect which side is worn most heavily. If needed, compare roller shade clutch replacements and replacement bead chains.
- Inspect the shared brackets before reinstalling: If the dual bracket system is bent, cracked, or difficult to release, replace it before putting the same blinds back up.
- Clean the blinds while they are down: It is much easier to dust the tubes, fabrics, and chain mechanisms once the blinds are off the window. Be careful not to mark the fabric while cleaning.
- Store each blind loosely rolled: Avoid tying the fabrics tightly or stacking heavy objects on top. Double roller fabrics can crease if stored badly.
- Decide whether to repair or replace: If removal exposed worn clutches, damaged brackets, or shifting fabric wraps, compare Double Roller blind options with the cost of repair parts before reinstalling the same setup.

Boolegon Dual Roller Shades, Cordless Double Window Shades Blackout and Light Filtering Shades with Valance, Day and Night Roller Blinds for Home Office Door, Jacquard Beige & White, Custom Size
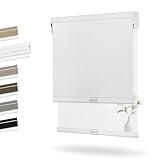
Boolegon Dual Roller Shades, Cordless Double Window Shades Blackout and Light Filtering Shades with Valance, Day and Night Roller Blinds for Home Office Door, Linen White & White, Custom Size

Dailyshades Double Layer Cordless Blackout Roller Blinds – 35"x72" Light Blocking Window Shades, Heat Insulating Thermal Curtains, Easy Install Privacy Filter for Bedroom, Living Room, Office, White
Double Roller Blind Removal FAQ
Do I need to lower both shades before removing a Double Roller blind?
Yes. Lowering both layers into a more relaxed position helps reduce tension and makes the rollers easier to support during removal.
Which roller should I remove first on a Double Roller blind?
In most cases, remove the front or more accessible roller first, then take down the rear roller second. That usually gives you the easiest access to the shared bracket system.
Can Double Roller blind fabric get damaged during removal?
Yes. If either roller is pulled by the fabric, dropped unevenly, or tied too tightly after removal, the material can crease, mark, or shift on the tube.
Why will my Double Roller blind not come out of the bracket?
The most common reasons are a tight control-side clip, a hidden retaining tab, or a spring-loaded idle-end pin that still needs to be compressed slightly before the roller will lift free.
Should I remove the chains before taking down the blinds?
Not usually. In most cases, the chains can stay attached during removal unless you are planning to replace the clutches or chain loops afterward.
What if one clutch looks worn after I remove the blinds?
That is a good time to replace it because the rollers are already down. Comparing roller shade clutch replacements can help before reinstallation.
Can I reinstall the same Double Roller blind after taking it down?
Yes, as long as both rollers, the brackets, the chains, and the clutches are still in good condition. Removal is also a useful chance to clean the blinds and replace worn parts first.
Are Double Roller blind brackets universal?
Not always. Many systems look similar, but bracket depth, clutch size, idle-end design, and the way the two rollers stack can vary by brand.
Summary
Removing double roller blinds safely is mostly about treating the setup as two separate rollers in one shared bracket system, supporting each tube carefully, and protecting both fabrics from twisting, creasing, or rubbing while the blinds come down. Once the blinds are off the window, you can inspect the clutches, chains, idle ends, and shared brackets more closely, clean the rollers more easily, and decide whether the system is ready to go back up or needs replacement parts first. If your removal project turns into a repair job, it also helps to review repair Double Roller blinds before reinstalling the blinds.

60 PCS Vertical Blind Repair Tabs Kit Clear Fixer Verticle Blinds Snap in Replacement Slats Parts Panels

30 Sets (60 Pcs) Vertical Blinds Replacement Slats Panels, Vertical Blind Repair Tabs Kit, Clear Apartment Blinds Replacement Fixers, Horizontal Blinds Replacement Parts
