
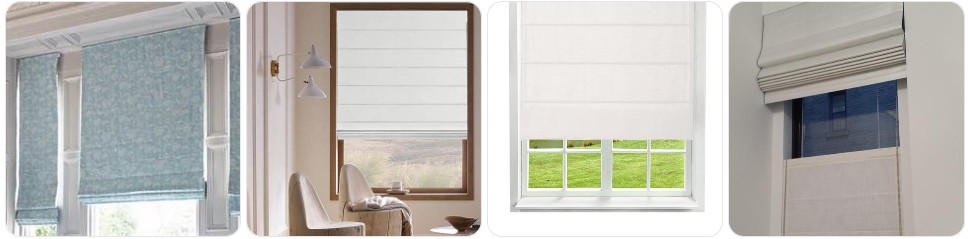
If you need to remove Cascading Roman blinds without damaging the layered folds, fabric loops, lift cords, or headrail, the safest approach is to lower the blind gently, support the fabric evenly, and release the mounting hardware without letting the blind drop or twist. Cascading R([forwindowblinds.com](https://forwindowblinds.com/types-of-blinds/))red folds that keep a decorative look even when raised, so they need more careful handling during removal than flatter Roman styles because twisting the fabric can spoil the soft structured profile. This guide explains how to take down Cascading Roman blinds step by step while protecting the cords, brackets, sewn rings, and fold shape. If you think you may need hardware or cord components afterward, it also helps to review Cascading Roman blind parts before you begin.
What You Need Before Removing Cascading Roman Blind
- A stable step stool or ladder: Cascading Roman blinds are often mounted above the window on a headrail, track, or top board, so steady overhead access makes removal much easier and helps prevent the fabric from being pulled unevenly during release.
- A screwdriver set: Many Cascading Roman blinds use face-fix or top-fix brackets, screws, or a mounting board, so a screwdriver set is one of the most useful tools to have ready before you begin.
- Needle-nose pliers: A pair of needle-nose pliers can help if a bracket pin, cord guide, or stubborn retaining tab needs careful handling during removal.
- A clean bed, table, or large flat surface: Cascading Roman blinds are fabric blinds with decorative folds, so they should be placed on a clean surface as soon as they come down to avoid crushing the fabric shape.
- Soft ties or fabric straps: These help you secure the blind loosely after removal. Do not tie the folds too tightly, because the layered profile can flatten or crease if compressed too much.
- A container for screws, brackets, and cord guides: Small mounting pieces, bracket covers, screws, and cleats are easy to lose once the blind is off the wall or mounting board.
- Optional cord and hardware parts on hand: If the blind already shows wear, it may help to compare Roman shade cord repair kits, cord lock replacements, or Roman shade rings before you start.
Cascading Roman Blind Removal Guide
Cascading Roman blind removal is mostly about protecting the decorative fold shape while keeping the lift cords from tangling. Because this style has fuller layered folds than a flat Roman blind, it should never be yanked down by the lower fabric or allowed to fall under its own weight while the brackets are being released. The safest method is to lower the blind first, support the top edge evenly, and move it to a clean flat surface as soon as it comes down so the folds and fabric profile stay neat.
- Lower the Cascading Roman blind fully or nearly fully: Bring the blind into a relaxed position so the lift cords are not holding the fabric under strong tension. This makes the blind easier to handle and reduces strain on the sewn rings and cord guides.
- Straighten the fabric lightly before removal: Smooth the folds gently with your hands so the layered sections are sitting evenly. Cascading Roman blinds can lose their shape more easily if the fabric is already skewed before removal.
- Inspect the top mounting style first: Look for brackets, screws, a headrail, or a wooden mounting board. Some Cascading Roman blinds are bracket-mounted, while others are fixed more like a fabric Roman shade attached to a top board.
- Support the top edge with one hand: Before undoing any screw or bracket, hold the blind near the mounting rail or board. Do not hold the full weight by the fabric alone, because that can stretch the top seam and distort the fold pattern.
- Release or unscrew one side first: If the blind is bracket-mounted, open or loosen the first bracket carefully. If it is screw-fixed, remove one side while keeping the rest supported so the blind does not swing forward suddenly.
- Move to the second side and any center supports: Wider Cascading Roman blinds may have a center support or extra screws along the top. Remove these gradually while keeping the full width supported so the fabric stays level.
- Bring the blind down evenly: Once all brackets or screws are free, lower the blind in a controlled motion and keep the cords from catching on brackets, cleats, or wall fixings.
- Lay the blind flat immediately: Place the Cascading Roman blind on a clean bed, table, or large protected surface so the folds can settle naturally without being crushed.
- Loosely gather and secure the cords: Wrap the lift cords neatly and keep them separate from the fabric folds so they do not knot or pull against the sewn rings during storage.
- Inspect the blind while it is down: Check the rings, cords, top seam, cord lock, pulleys, and mounting points for wear. If needed, compare cord repair kits, shade rings, and mounting brackets before reinstalling.

20pcs White Plastic Cord Tassel Window Blind Cord Knobs Drops Pull End for Roman Shades Curtain Crafts Drawstring Tassels

6 Pieces White Roman Shade Cord Lock Dual Brass Wheels Stainless Bracket

#560 Universal Roller Shade Replacement Parts, Roller Blind Fitting Repair Kit for 1.5"(38mm) Tube with R16 Clutches, Metal Bracket, and End Plug
Common Problems When Taking Down Cascading Roman Blind
- The fabric folds twist during removal: Cascading Roman blinds are built around even layered folds, so uneven handling can make one side fall differently from the other. Straighten the folds lightly before continuing.
- The lift cords tangle as the blind comes down: This is one of the most common removal problems. Keep the cords loose but separate so they do not knot around rings, guides, or folds.
- The layered folds start flattening or creasing: This usually happens when the blind is bent sharply or placed down carelessly. Always have a clean flat surface ready before you release the last fixing point.
- A sewn ring or guide looks loose: This is often easier to spot once the blind is down. If that happens, it may help to compare Roman shade rings before reinstallation.
- The bracket screws are difficult to reach behind the fabric: Cascading Roman fabric can hide the top hardware more than a flatter Roman style does. Move the fabric aside gently instead of pulling the blind down roughly.
- The blind feels heavier than expected at the top: Even though Cascading Roman blinds are soft, the headrail or mounting board can still feel awkward once it comes free. Support the blind across the width instead of from one corner.
- The cord lock or pulleys already look worn: Removal often reveals hardware wear that was not obvious while the blind was hanging. If needed, compare cord lock replacements and shade cord repair kits before you put it back up.
What to Do After Removing Cascading Roman Blind
- Lay the blind flat and smooth the folds gently: Cascading Roman blinds should not be dropped into a pile or folded sharply. Keep the layered folds as neat as possible so the blind keeps its intended decorative look.
- Check the cords, rings, and top seam: This is the best time to spot frayed lift cords, loose rings, worn pulleys, or stress around the mounting line. If needed, compare cord repair kits and shade rings.
- Clean the fabric carefully if needed: Cascading Roman blinds have a decorative fabric finish, so use a gentle cleaning method that will not crush or warp the fold pattern before storage or rehanging.
- Store the blind in a way that protects the drape: Avoid compressing the fabric under heavy objects. A loosely folded or gently rolled storage method is usually better than a tight fold that can flatten the layered sections.
- Keep the hardware together: Store the brackets, screws, cord cleats, and any small guides in one labeled container so reinstallation is much easier later.
- Decide whether to repair or replace: If removal exposed worn cords, loose rings, or a damaged top mounting area, compare Cascading Roman blind options with the cost of replacement parts before rehanging the same blind.
- Label the blind if it came from a multi-window room: Cascading Roman blinds are often chosen for a specific fabric look and fold fullness, so labeling helps avoid mixing them up if you take down more than one.

ARLO BLINDS Bamboo Roman Shades w/Valance 30" W x 74" H, Tuscan

StangH No Drill Roman Shades for Indoor Windows, Magnetic Floral Bird Velvet Cordless Roman Blind Privacy Room Darkening Vintage Window Covering for Bedroom, Green, W 26 x L 64, 1 Panel

Boolegon Blackout Roman Shades for Indoor Windows, Linen White, Custom Size
Cascading Roman Blind Removal FAQ
Do I need to lower Cascading Roman blinds before removing them?
Yes. Lowering the blind into a relaxed position reduces tension on the lift cords and makes the fabric easier to handle during removal.
Can Cascading Roman blind fabric get damaged during removal?
Yes. If the blind is pulled down by the fabric, dropped unevenly, or tied too tightly afterward, the layered folds can stretch, flatten, or crease. It is always better to support the blind by the top edge or mounting area.
Why do the lift cords tangle when I take down a Cascading Roman blind?
Cascading Roman blinds use multiple lift points and decorative folds, so the cords can cross or knot easily when the blind is lowered off the brackets. Wrapping the cords separately after removal helps prevent that problem.
Are Cascading Roman blinds removed the same way as standard Roman blinds?
They are similar in some cases because both often use fabric lift systems and top mounting hardware, but Cascading Roman blinds have fuller layered folds, which makes careful fabric handling even more important.
Should I untie or disconnect the cords before taking down the blind?
Not usually. In most cases, it is better to remove the full blind first and then inspect the cord system while the blind is lying flat on a clean surface.
What if a ring or cord guide comes loose after I remove the blind?
That is a good time to repair it, because the blind is already down and much easier to work on. Small sewn components are usually easier to inspect and fix off the window.
Can I reinstall the same Cascading Roman blind after taking it down?
Yes, as long as the fabric, lift cords, top seam, and mounting hardware are still in good condition. Removal is also the best time to check for hidden wear before rehanging it.
What is the safest way to store Cascading Roman blinds after removal?
The safest option is to keep the blind on a clean protected surface, with the folds gently arranged and the fabric lying naturally. Avoid crushing the material or placing heavy items on top of it.
Summary
Removing Cascading Roman blinds safely is mostly about supporting the top edge properly, lowering the blind before undoing the brackets, and protecting the layered folds from stretching, flattening, or tangling while the blind comes down. Once the blind is off the window, you can inspect the cords, rings, top seam, and mounting hardware, clean the blind carefully, and decide whether it is ready to go back up or needs repairs first. If the removal turns into a repair project, it also helps to review repair Cascading Roman blinds before reinstalling the blind.

60 PCS Vertical Blind Repair Tabs Kit Clear Fixer Verticle Blinds Snap in Replacement Slats Parts Panels
SOGEWO (16 Set/32 Pieces) Clear Vertical Blind Repair Tabs, Vertical Blinds tabs/Blind Fixers for Vertical Blinds Replacement Slats & Parts
