
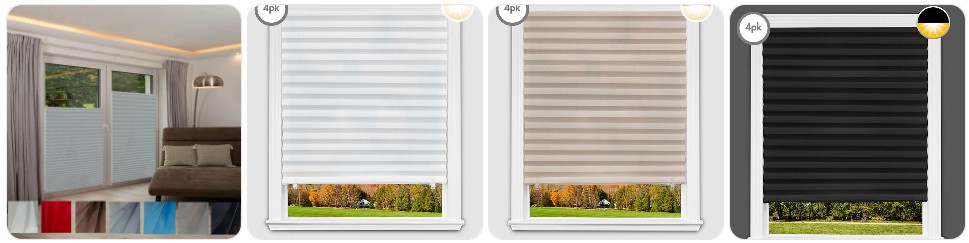
Removing stick-on blinds is usually simple, but the safest method is to loosen the adhesive slowly so you do not tear the blind material, bend the headrail, or leave heavy residue on the glass or frame. In most cases, you can take down stick-on blinds by warming the adhesive, peeling from one corner with steady pressure, and cleaning off any remaining sticky backing afterward. If you plan to reuse the blind or replace worn adhesive pieces, it also helps to check Stick-On blind parts before you start.
What You Need Before Removing Stick-On Blind
- A stable step stool if the blind is mounted high: Stick-on blinds are often fitted directly to the top of the window glass or upper frame, so safe access makes it easier to peel the adhesive evenly rather than yanking one side down.
- A hair dryer or low-heat tool: Gentle heat helps soften the adhesive strip so the blind comes off more cleanly. Many people use a hair dryer for adhesive removal instead of pulling the blind off cold.
- A plastic scraper or plastic pry tool: A non-metal edge is safer for lifting stubborn corners of stick-on blind adhesive without scratching glass, painted trim, or vinyl frames. You can compare plastic scrapers for adhesive removal if needed.
- A microfiber cloth or lint-free towel: Stick-on blind adhesive often leaves a tacky film behind, so a microfiber cloth is useful for cleaning the glass or frame after removal.
- An adhesive remover suitable for windows and frames: If the blind has been up for a long time, the backing may not peel away in one piece. In that case, a gentle adhesive remover for glass and vinyl can make cleanup much easier.
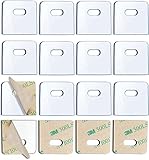
- Replacement adhesive strips if you want to reuse the blind: Some temporary or stick-on blinds can be rehung with fresh adhesive if the blind body is still in good condition. You can look at adhesive strips for temporary blinds before taking the old one down.
- A trash bag or flat clean surface: If the stick-on blind is old, dusty, or damaged, it helps to have a place ready for disposal or inspection once it comes off the window.
Stick-On Blind Removal Guide
Before removing a stick-on blind, check whether it is attached directly to the glass, to the upper sash, or to the face of the frame. That matters because adhesive can release differently on smooth glass than on painted wood, vinyl, or aluminum. The key is to soften the adhesive first and peel slowly instead of pulling the blind straight down. Fast removal can tear pleated paper shades, bend lightweight rails, strip paint, or leave a heavier glue line behind than necessary.
- Inspect how the stick-on blind is mounted: Look closely at the top edge to see whether the adhesive strip is attached to glass, a painted frame, metal, or vinyl. This tells you how cautious you need to be with heat and peeling pressure.
- Raise or compress the blind fully if possible: If your stick-on blind is a pleated temporary style, collapse it upward first so the weight is not pulling against the adhesive while you remove it.
- Warm the adhesive gently: Use a hair dryer on a low or medium setting and move it along the top strip for 20 to 40 seconds at a time. Do not overheat the area, especially on vinyl frames or delicate finishes.
- Start at one corner: Use your fingernail or a plastic pry tool to lift one edge of the adhesive strip. Avoid metal blades on the glass edge or frame unless you are extremely careful, because stick-on blinds are usually light-duty and do not need aggressive force.
- Peel the adhesive slowly across the width: Pull the strip back on itself at a low angle rather than yanking downward. This gives the adhesive more time to release and reduces the chance of tearing the top rail or blind material.
- Support the blind as the strip comes free: Even though stick-on blinds are light, the blind can still drop suddenly once the final section releases. Keep one hand under it so it does not crumple or hit the sill.
- Reapply gentle heat to stubborn sections: If part of the strip feels stuck, pause and warm that area again instead of pulling harder. This is especially important for older stick-on blinds where the adhesive has hardened over time.
- Remove any leftover adhesive from the glass or frame: Wipe the area with a window-safe adhesive remover and a soft cloth. For thicker residue, a plastic scraper can help lift the glue without scratching.
- Inspect the blind if you want to reuse it: Check whether the top edge is torn, the pleats are crushed, or the old adhesive backing is still attached unevenly. Many stick-on blinds can only be reused if the mounting edge is still clean and straight.
- Clean and dry the area fully: Before installing another blind, make sure the glass or frame is completely free of residue and moisture so the next adhesive strip bonds properly.

60 PCS Vertical Blind Repair Tabs Kit Clear Fixer Verticle Blinds Snap in Replacement Slats Parts Panels

Quadafy 2 Pack 17 inch Blind Wand, Vertical Blinds Replacement Parts
SOGEWO (16 Set/32 Pieces) Clear Vertical Blind Repair Tabs, Vertical Blinds tabs/Blind Fixers for Vertical Blinds Replacement Slats & Parts
Common Problems When Taking Down Stick-On Blind
- The blind tears at the top when peeling: This usually happens when the adhesive is pulled off cold or too quickly. A little heat and a lower peel angle make a big difference with lightweight stick-on blinds.
- Adhesive residue stays on the window: Older stick-on blind strips can dry out and split, leaving a sticky line behind. A gentle adhesive remover is often the easiest fix.
- The blind crumples as it comes down: Pleated stick-on blinds can collapse awkwardly if they are not compressed first or if the final section releases suddenly. Supporting the blind from underneath helps keep it neat.
- Paint or finish starts lifting with the adhesive: This is more likely when stick-on blinds are attached to painted timber or older surfaces instead of glass. Stop, add more heat, and peel more slowly rather than forcing the strip off.
- The top rail bends during removal: Some stick-on blinds use very light top rails or stiffened paper headers, and they can warp if one side is pulled too hard before the rest of the adhesive loosens.
- The blind cannot be reused after removal: If the adhesive backing tears the top edge, leaves the header uneven, or the pleats are crushed, the stick-on blind may not hang straight again even with fresh adhesive.
- New adhesive will not stick afterward: This usually means the surface still has old glue, dust, or cleaning-product residue on it. The mounting area needs to be completely clean and dry before rehanging another stick-on blind.
What to Do After Removing Stick-On Blind
- Clean off all remaining adhesive: Removing every bit of residue is important if you plan to install another stick-on blind in the same spot. Even a thin glue film can prevent a new strip from holding properly.
- Inspect the window surface carefully: Check the glass, sash, or frame for lifted paint, sticky patches, or marks caused by old adhesive so you can correct them before rehanging anything.
- Decide whether the blind is reusable: If the top edge is straight and the material is not torn, some stick-on blinds can be rehung with fresh adhesive strips for temporary blinds.
- Store reusable blinds flat or upright without crushing them: Pleated stick-on blinds can lose their shape if they are folded, bent, or stacked under heavy items after removal.
- Replace damaged adhesive rather than reusing old backing: Once a stick-on blind has been removed, the original adhesive rarely performs like new. Fresh mounting strips usually give a cleaner and more secure second installation.
- Wipe the area with a dry microfiber cloth before reinstalling anything: This helps remove any last dust or cleaner residue that could interfere with the next adhesive bond.
- Consider a replacement if the blind is warped or torn: If the header, pleats, or mounting strip area is damaged, it may be more practical to switch to a new stick-on blind replacement rather than trying to force the old one back into shape.

Window Blinds Cordless No Drill Cut to Size Clip On Stick On Self Adhesive Temporary Blinds Pleated Paper Blinds for Windows Doors Shades for Home Nursery Bedroom Kitchen Bathroom

Window Blinds Cordless No Drill Cut to Size Stick On Temporary Paper Shades
Window Blinds Cordless No Drill Cut to Size Clip On Stick On Self Adhesive Temporary Blinds Pleated Paper Blinds for Windows Doors Shades for Home Nursery Bedroom Kitchen Bathroom
Stick-On Blind Removal FAQ
How do you remove stick-on blinds without damaging them?
The safest method is to warm the adhesive first, lift one corner gently, and peel the strip back slowly at a low angle while supporting the blind so it does not crumple or tear.
Can stick-on blinds be reused after removal?
Sometimes. A stick-on blind can often be reused if the top edge stays straight, the material does not tear, and you replace the old adhesive with fresh mounting strips.
What is the best way to remove adhesive residue from a stick-on blind?
Use a soft cloth with a window-safe adhesive remover, then lift any stubborn residue with a plastic scraper rather than a metal blade to reduce the risk of scratching.
Should I use heat when taking down stick-on blinds?
Yes, gentle heat is usually very helpful. Warming the adhesive makes it easier to peel the strip off cleanly and lowers the risk of tearing the blind or pulling finish from the frame.
Why did my stick-on blind tear while I was removing it?
This usually happens when the adhesive is pulled off too fast, removed without heat, or the blind is hanging under tension instead of being supported during removal.
Can stick-on blinds damage window frames?
They can, especially on delicate paint or older finishes. Removing the adhesive slowly with mild heat reduces the chance of lifting paint or leaving heavy glue residue behind.
What should I do before installing a new stick-on blind after removing the old one?
Clean off all old adhesive, dry the surface fully, and make sure the window area is smooth and dust-free so the new adhesive strip bonds properly.
When is it better to replace a stick-on blind instead of reusing it?
If the top mounting edge is torn, the pleats are crushed, the header is bent, or the blind no longer hangs straight, replacing it is usually easier than trying to reuse it.
Summary
Taking down stick-on blinds is mostly about softening the adhesive, peeling the blind off slowly, and cleaning the surface properly afterward so you do not damage the blind or the window area. If you compress the blind first, use gentle heat, support it as the strip releases, and remove leftover residue before reinstalling anything new, the job is usually quick and low-risk. If the blind or adhesive parts are worn and you are deciding whether to fix or replace them, it is also worth checking repair Stick-On blinds before you move on to a full replacement.
60 PCS Vertical Blind Repair Tabs Kit Clear Fixer Verticle Blinds Snap in Replacement Slats Parts Panels

#560 Universal Roller Shade Replacement Parts, Roller Blind Fitting Repair Kit for 1.5"(38mm) Tube with R16 Clutches, Metal Bracket, and End Plug
