
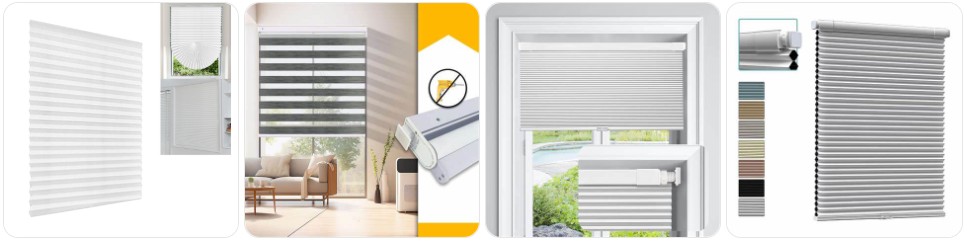
Removing tension blinds is usually easier than taking down drilled-in blinds, but the key is to release the spring or pressure fit slowly so you do not bend the rod, damage the brackets, or snap lightweight blind hardware. The quick answer is that most tension blinds come down by supporting the blind with one hand, reducing the pressure at one side of the rod or wire system, and then easing the blind out of the window recess instead of pulling it straight down. Before you begin, it also helps to look at Tension blind parts so you know which rods, end caps, brackets, clips, wire fittings, or support pieces may need attention after removal.
What You Need Before Removing Tension Blind
- A stable step stool if the blind sits high in the recess: Tension blinds are often mounted tightly inside window frames, so you need to be level with the rod or wire fixing to release it evenly instead of twisting one side down.
- Your hands free to support both the blind and the rod: Unlike fixed blinds, tension blinds can spring outward suddenly when released. It is important to control the weight of the blind while easing off the pressure.
- A small flathead screwdriver or slim pry tool: Some tension blind systems use tight end caps, grip shoes, or hidden clips that need a gentle nudge. A small flathead screwdriver or plastic pry tool set can help without marking the frame.
- A soft cloth or towel: Tension blinds are often lightweight pleated, fabric, café, or recess-mounted styles that can crease easily once removed. Having a safe surface ready helps protect the blind immediately.
- A small container for loose parts: End caps, wire anchors, clips, support pads, and tension shoes are easy to misplace once the blind comes down. Keeping them together makes reinstallation much easier.
- Replacement hardware if the blind already feels loose or uneven: If the rod slips, the end caps are worn, or the blind no longer sits square in the frame, compare tension blind replacement parts before you start so you are ready if something needs changing.
- A tape measure: If you suspect the tension rod, support wire, or friction fittings are the problem, measuring the current setup before removal can save time when ordering replacements.
- Painter’s tape for labeling parts if needed: If your tension blind uses left and right fittings, wire guides, or multiple support clips, a quick label can prevent confusion during reinstallation.
Tension Blind Removal Guide
Tension blinds are designed to stay in place by pressure, spring tension, or a slim internal mounting system, so the main mistake is trying to yank the blind straight down before the tension has been released properly. To remove a tension blind without damaging it, support the blind first, identify whether it uses a spring rod, wire system, or clip-in pressure fit, and then release one side gradually while keeping the rest of the blind controlled. Never pull hard on the fabric section alone, because the force should be taken by the rod, bar, or mounting points instead.
- Check how your tension blind is mounted: Before touching anything, look closely at the top of the blind. Some tension blinds are held by a spring-loaded rod, some use slim side shoes or wire tension, and others sit inside recess brackets. Understanding which type you have prevents damage caused by forcing the wrong point.
- Raise or gather the blind into a controlled position if possible: If the blind can be lifted or folded upward, doing so makes it easier to support and prevents the fabric from swinging while you release the mounting tension.
- Support the blind with one hand near the top bar or headrail: Tension blinds can pop free suddenly when the pressure is released, especially if the rod is under strong spring tension. Keep one hand on the structure of the blind rather than the fabric panel.
- Locate the side that compresses or releases first: On many tension rod systems, one side can be pushed inward to shorten the rod and free the opposite end. On wire-guided systems, there may be a fixing point or cap that loosens first.
- Reduce the tension slowly: Push the rod inward, twist the rod if the design requires it, or loosen the retaining point carefully. If you need help easing off a cap or fitting, use a small flathead screwdriver or plastic pry tool gently. Do not let the rod snap loose on its own.
- Free one end of the rod or support bar first: Once the tension reduces enough, ease one side out of the recess or bracket while still holding the rest of the blind steady. This is the safest way to stop the blind from twisting.
- Lift out the opposite side carefully: After one end is free, the second side should come out with much less effort. If it still feels stuck, stop and check whether a clip, hook, or retaining shoe is still engaged.
- Lower the blind slowly and keep the fabric supported: Tension blinds are often lightweight and can bend if the top bar is left hanging unevenly. Lower the whole blind together and place it straight onto your prepared surface.
- Inspect the rod, end caps, wire fittings, and pressure points: If the blind slipped before removal, check for worn rubber ends, bent rods, damaged clips, or stretched wire hardware. It can help to compare replacement tension rods, tension blind end caps, or tension blind repair kits before reinstalling.
- Store the blind flat and keep the parts together: Lay the blind on a bed, table, or clean floor area so the rod and fabric remain straight. Put all removable parts in a container right away so nothing gets lost.

2 Sets Universal Shade Blind Cord Tension Device for Window Blinds, fit for Hunter Douglas, Lever, graber & More for Required on Shade Traversing Panels and Window Treatment with Screws.

2 Sets Universal Shade Blind Cord Tension Device for Window Blinds,Fit for Hunter Douglas, Levelor, Graber & More for Required on Shades Traversing Panels and Window Treatment

4 Pack Universal Shade Blind Cord Tension Device for Window Blinds – Compatible with Hunter Douglas, Levolor, Graber & More, Window Blind Cord Holder for Traversing Panels
Common Problems When Taking Down Tension Blind
- The rod feels jammed in the recess: This often means the spring is still fully expanded or one end cap is gripping the frame more tightly than expected. Reducing the pressure gradually usually works better than pulling downward.
- One side comes loose but the other side stays stuck: Tension blinds can sit unevenly after long use. If one end is still wedged in place, re-compress the rod slightly and ease the remaining side out instead of twisting the bar hard.
- The blind starts to bend while coming down: This usually happens when the blind is being held by only one end or when the fabric is used as the lifting point. Always support the top bar or rod directly.
- Rubber end caps fall off or look worn: These parts help the tension blind grip the recess and stay centered. If they are cracked, flattened, or loose, compare replacement end caps for tension blinds before reinstalling.
- The blind was already slipping before removal: That often points to a worn rod spring, weak pressure fit, or damaged support hardware rather than a fabric issue. Looking at replacement parts for tension blinds can save time if you plan to refit the blind.
- Hidden clips or wire fixings are still attached: Some tension blinds are not just simple rods. Café-style or recess pleated versions may include support clips or tension wires that must be unhooked before the blind will come free.
- The fabric creases after removal: Lightweight tension blinds can crease if dropped, folded sharply, or left hanging from one side. Set the blind down flat as soon as it is removed.
- Small fittings get lost immediately: Pressure shoes, wire hooks, retaining clips, and small end pieces are easy to misplace because they are much smaller than the rod itself. A parts tray helps a lot here.
What to Do After Removing Tension Blind
- Lay the blind flat and keep the rod straight: Tension blinds can become misaligned if the rod or top bar is left leaning at an angle for too long.
- Inspect the pressure points and end caps: These are some of the most common failure points on tension blinds because they provide the grip that keeps the blind in the recess.
- Clean the recess where the blind was mounted: Dust, grease, or polish buildup inside the frame can make a tension blind slip or sit unevenly when reinstalled.
- Check for bent rods or stretched wire systems: If the blind was difficult to remove or was sagging before removal, inspect the support structure carefully before trying to put it back up.
- Replace worn parts before reinstalling: If the rod spring is weak, the end fittings are damaged, or clips are missing, compare tension blind repair kits and replacement rods for tension blinds before putting the blind back.
- Label and store the hardware together: This is especially helpful if the blind has left and right fittings, wire anchors, or multiple clips that need to go back in the same order.
- Decide whether the blind is worth reinstalling as-is: If the blind came down because it keeps slipping, tilting, or hanging unevenly, replacing the worn support parts now is usually better than reinstalling the same failing setup.

LazBlinds No Tools No Drill Cordless Cellular Shades, Light Filtering Honeycomb Shades for Home, Thermal Insulation Blinds for Windows, 22" W x 36" H, White
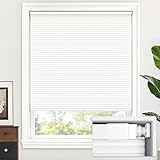
LazBlinds No Drill Cordless Cellular Shades, 34" W × 48" H, White
Tension Blind Removal FAQ
How do you remove a tension blind without damaging it?
The safest method is to support the blind near the top, reduce the spring or pressure tension gradually, release one side first, and then ease out the other side without pulling on the fabric alone.
Do tension blinds just pull down?
No. Most tension blinds need the rod, wire, or pressure system to be released first. Pulling straight down can bend the rod, crack the end caps, or crease the blind.
Should the blind be open or closed before removing it?
If possible, put the tension blind into a more controlled or gathered position before removal. That makes it easier to support and reduces the chance of fabric damage while you release the fittings.
Why is my tension blind stuck in the window recess?
This usually means the spring rod is still fully expanded, the end caps are gripping tightly, or there is an extra support clip or wire fixing still attached.
Can I remove a tension blind by myself?
Yes, many tension blinds can be removed by one person because they are lightweight, but it is still important to support the blind properly so it does not twist or snap free suddenly.
What tools do I need to take down a tension blind?
A step stool if needed, a small flathead screwdriver or plastic pry tool, a soft cloth or safe surface for the blind, and a container for small fittings are the most useful items.
What if the rod spring feels weak after removal?
If the spring no longer holds pressure well, the blind may keep slipping after reinstallation. In that case, replacing the rod or the worn end fittings is usually the better fix.
What should I check after removing a tension blind?
Inspect the rod, end caps, clips, wire supports, pressure shoes, and the top bar for wear or bending. Those are the parts most likely to cause slipping, uneven hanging, or poor fit in the recess.
Summary
Taking down tension blinds is mainly about releasing the pressure in a controlled way and supporting the blind evenly while it comes free. Because tension blinds rely on rods, wire systems, end caps, and pressure fittings rather than fixed drilled brackets, they should be eased out gently instead of pulled loose all at once. After removal, inspect the rod, recess grip points, clips, and end caps, clean the mounting area, and replace any worn hardware before reinstalling. If the blind keeps slipping, hanging unevenly, or losing grip, it may also help to see how to repair Tension blinds before deciding whether to replace the whole setup.

60 PCS Vertical Blind Repair Tabs Kit Clear Fixer Verticle Blinds Snap in Replacement Slats Parts Panels

#560 Universal Roller Shade Replacement Parts, Roller Blind Fitting Repair Kit for 1.5"(38mm) Tube with R16 Clutches, Metal Bracket, and End Plug
